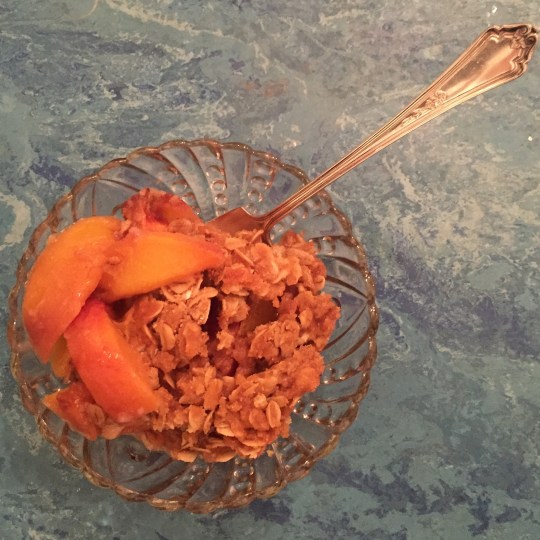
Looking for a perfect* summer dessert? Stop googling and start making this. This particular crisp was made from peaches purchased at Sweet Corn Charlie’s stand in Syracuse, Indiana. They were the kind of peaches that were begging to be eaten–perfectly fragrant and just soft enough that if we let them go another day they would have turned to mush.
This is a simple recipe with ingredients you might even have in your pantry and fridge. You can even make it ahead and keep it in the fridge until you are ready to bake it. The hardest part is remembering to turn on the oven before dinner so you can pop the crisp in the oven while you eat. My suggestion is to serve it with some vanilla ice cream**, but then again my suggestion is to always serve everything with some vanilla ice cream. Thanks to T for creating this with me and remembering that very important step to turn the oven on. This recipe comes from All Recipes.
*By perfect I mean one that does not take your time away from having lots of summer fun outside.
**That is, unless you already had a root beer float 2 hours earlier because you were trying to fit an entire summer into one day.
Ingredients:
5-6 peaches, sliced
1/2 c all purpose flour
1/2 c brown sugar
1 stick of cold butter (1/2 c), cut into pieces
1 c rolled oats
1 t ground cinnamon
1/4 t salt
Directions:
- Preheat oven to 350 degrees.
- Arrange peaches evenly in 8X8 baking dish.
- Mix flour, sugar, butter, cinnamon and salt in a bowl. Mix in the oats. Sprinkle and press topping into the peaches.
- Bake for 30 minutes, or until topping is browned.

Sometimes G goes on a ketchup, butter, and bacon diet, like at dinner last night.
Then I wake up the next morning and try to do some damage control.
Enter Greek Yogurt Ice Pops. Thanks to CB for the inspiration!
I used blackberries and peaches because that’s what was at the Carroll Gardens Farmer’s Market yesterday, but you can use any fruit/yogurt combination. Why not put in some greens, too?
We did rainbow pops last year without yogurt and those are just as delicious but in a different vegan sort of way. It depends on what you’re in the mood for. If you want to know more about these freezer molds, check out that post.
Ingredients:
1/3 cup Greek Yogurt (We love Wallaby)
a handful of blackberries (I used 5 large ones)
1 peach, peeled
1 teaspoon honey
1/2 cup water, more as needed
Directions:
Combine all ingredients in blender and blend until liquified. Add more water to thin as needed. Freeze for at least 4 hours. Enjoy!
BONUS: If you have a toddler, this human can help you with every step of this process. G especially liked putting the handles in the molds like a little puzzle.

Here’s another way to preserve the jalapeños that are taking over my rooftop. If you don’t have this problem, its worth buying a whole bunch of hot peppers so you can make your own spicy sauce, which is much better than anything you can buy in the store. I only slightly modified yet another incredible recipe from Karen Solomon’s Jam It, Pickle It, Cure It.
This recipe makes about 3 cups and the sauce will last in the fridge for 6 months.
Warning: Wear gloves and work in a well-ventilated area when working with jalapeños.
Ingredients:
20-25 jalapeño peppers
2 large cloves of garlic, peeled
1.5 T kosher salt
1 cup distilled white vinegar
2 T sugar
Directions:
- Wash and dry the peppers and cut off the stems. Slice them in half lengthwise. Broil, outside skin near flame, until black and charred. Check the every few minutes as once they start charring, they turn black pretty quick.
- In a food processor or blender, puree the garlic until minced. Add the peppers, salt, vinegar, and sugar and puree for about 3 minutes. If you have a high power blender, just run all the ingredients together for 1 minute.
- Transfer to a glass jar and refrigerate.

Here’s a quick way to preserve jalapeño peppers. Great for topping nachos, salads, in sandwiches, etc.
Ingredients:
3/4 cup distilled white vinegar
3/4 cup water
1 garlic clove, crushed
3 T white sugar
1 T kosher salt
10 jalapeños, sliced into rings – use gloves to chop or you’ll regret it later when you take out your contact lenses.
Directions:
Pour all ingredients except peppers into a small pot. Once mixture boils, stir in jalapeños and remove from heat. Let sit for ten minutes and watch the color turn before your very eyes.
Use tongs or a slotted spoon to transfer jalapeños to a pint size mason jar and cover with vinegar mixture. Bottle it up, and enjoy topping your food with a kick for the next month or so.


Here’s a great way to get creative with your bumper crop of cucumbers, and it takes only 10 minutes from garden to plate. I used a mandolin for maximum beauty and because I like to live on the edge. Thanks to Karen Solomon and her book Jam It, Pickle It, Cure It for this and so many other fun kitchen ideas.
Ingredients:
1 large cucumber – sliced thin
1 small red onion-sliced thin
2 teaspoons brown rice syrup (or sugar or your sweetener of preference)
2 teaspoons kosher salt
1/2 cup unseasoned rice vinegar
Mix all ingredients together and let sit for 30 minutes. It can be refrigerated for 2 days.

It was a cool day at the lake today, so we headed to The Berry Patch in Etna Green, Indiana for blueberry picking. This jam became the perfect highlight of this colorfully festive blueberry and ricotta crostini which can be made in less than 30 minutes from beginning to end. Add a strawberry or raspberry for an additional color and you have a perfect snacketizer for the 4th of July.
Ingredients: (this makes about 3/4 cups jam when cooked)
2 cups blueberries
1/2 cup sugar
1/2 T lemon juice
Heat all ingredients in a saucepan over medium heat, stirring frequently until thickened. You know its ready when is starts to stick to the spoon and your toddler is screaming that he wants some NOW!
For the crostini, simply broil some slices of french bread in the oven. Then get creative with decorating with ricotta cheese, blueberry jam, and your red berry of choice.

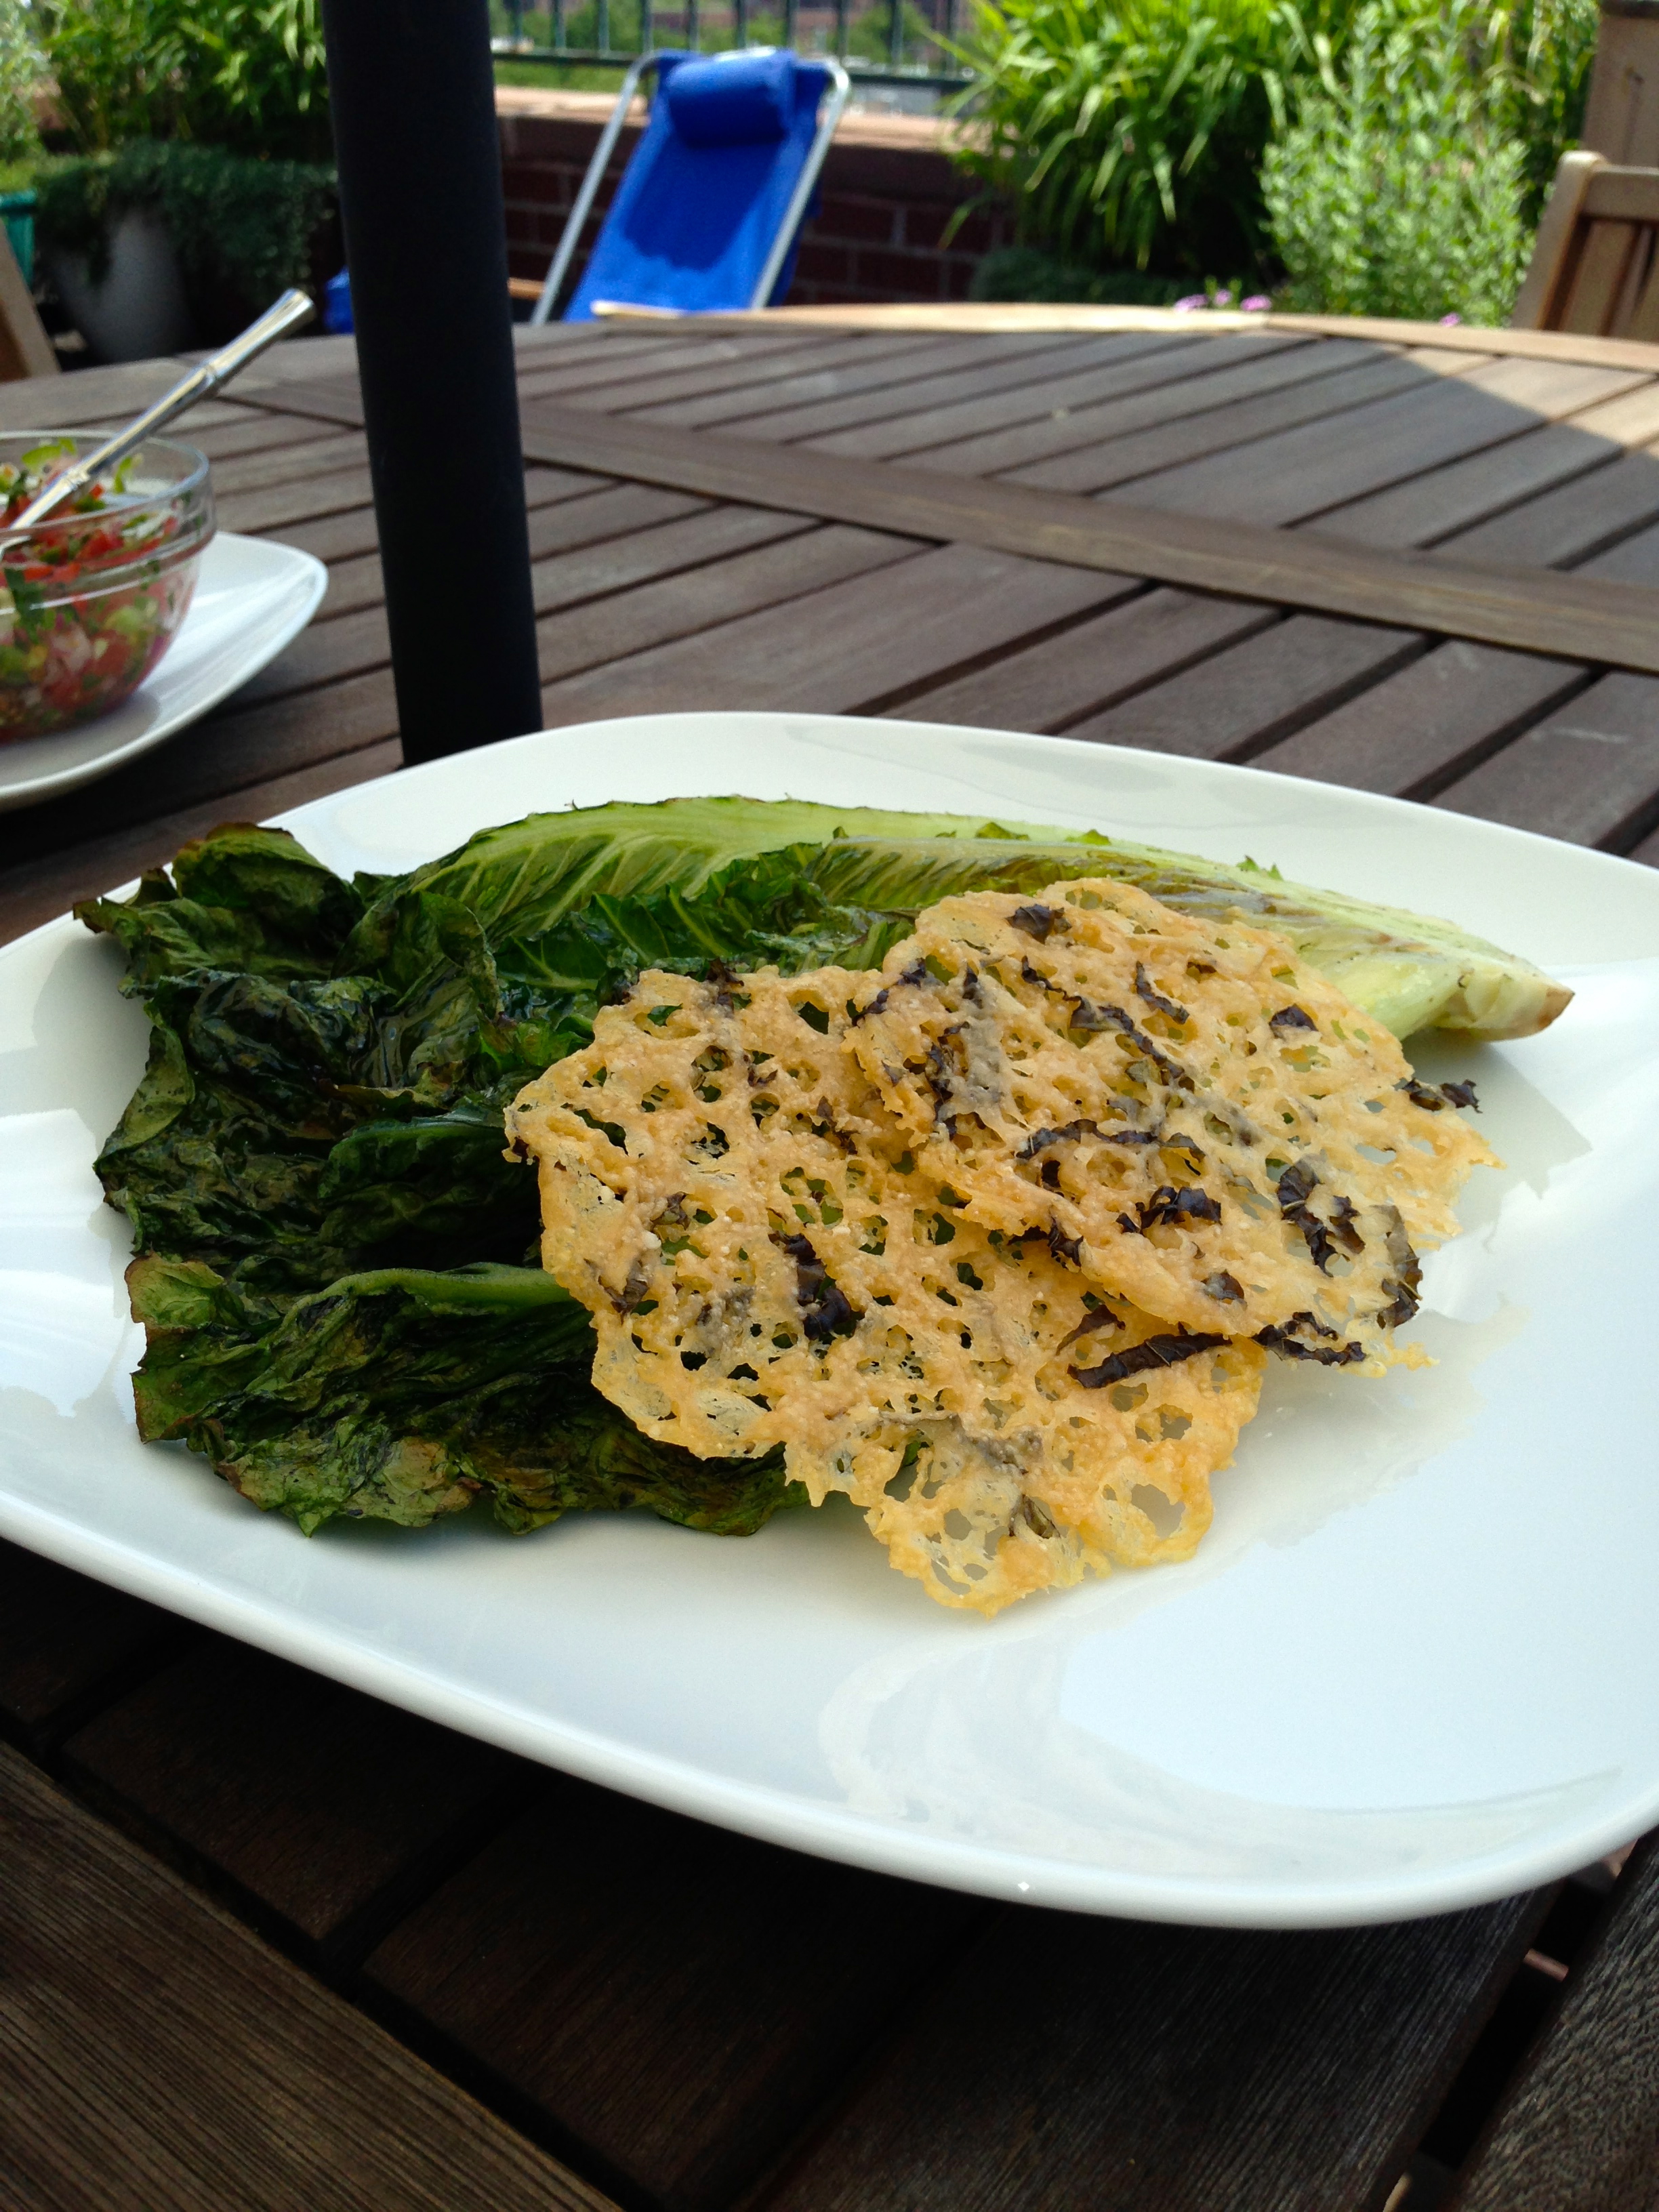
With the recent abrupt onset of summer, our grill has been getting some good use lately. Although I love grilling vegetables (asparagus, potatoes, eggplant, and portabellas are among my favorites), I kept my greens off the flames until today. I’m happy to report a new vegetable will now be part of the regular rotation. The parmesan basil crisps on top of the lettuce add the necessary crunch. Also, parmesan cheese might be one of the best foods out there and making these crisps seemed like a fun experiment to try on this quiet Sunday.
The crisps can be made a day ahead of time and stored in an air-tight container. Hopefully you make a few extra because you’ll want to taste a few right away, just in case.
Thanks to Grillin’ Fools for the lettuce method, and to Giada for the crisp method.
Ingredients:
- 1 cup shredded parmesan cheese
- 3 T julienned basil
- 2 large heads of romaine lettuce, outer leaves removed, cleaned and patted dry, and sliced lengthwise down the middle
- 3 T olive oil
- 2 garlic cloves, minced
- salt and pepper
Directions:
For the crisps…
- Preheat oven to 400 degrees.
- Combine cheese and basil.
- Put a heaping tablespoon on a parchment-lined baking sheet. Flatten gently.
- Continue to add more tablespoons of the cheese mixture, leaving a bit of space between each one.
- Cook for 3-5 minutes, until golden and crisp.
- Allow to cool, and then remove with a flat spatula.
For the lettuce…
- Once your lettuce is dry, you’re good to go.
- Heat grill to medium-high
- Combine olive oil, garlic, salt, and pepper and set aside for a few minutes so that the oil gets garlicky.
- Brush both sides of the lettuce with the oil mixture, starting with the rounded side and then doing the flat side of the lettuce.
- Place the romaine heads flat side down on the grill.
- After 2-3 minutes (check for a nice browning), flip the lettuce 1/3 way. Repeat again after 2-3 minutes more. Do it again until the lettuce is nicely browned all over.
- Serve with crisps.

Today was an exciting day at the Carroll Gardens Farmer’s Market. There were ramps and asparagus! Seeing these signs of spring made me feel better about still wearing my winter coat on April 21st. I was hoping that Grazin’ Angus had some fresh cream so I could make my own butter, but they didn’t. They did have their own butter, which I used for this recipe. Thanks for Birdworms and Buttermilk for this great idea. I think this would be a great base for sautéing some of the asparagus I got this morning. I tasted a little bit of this today, and reluctantly froze the rest.
Ingredients:
- 1/2 pound butter, softened (I used unsalted, so I added salt to the recipe)
- 1 bunch ramps, cleaned
- zest and juice from 1/2 lemon
- 1/4 teaspoon salt (omit if using salted butter)
Directions:
- Place butter in medium bowl; set aside.
- Blanch ramps in boiling water for about 30 seconds, then place in an ice water bath to stop the cooking. Squeeze excess water and then chop the ramps.
- Add the chopped ramps, zest, lemon juice, and salt (if using) to the butter and mix thoroughly with a spoon or spatula.
- Form the butter into a log shape on a piece of parchment paper. Tightly roll the parchment paper around the butter, and twist the ends tootsie-roll style. Store in the freezer until you are ready to enjoy.

Trade in your green beer for a green smoothie this St. Patrick’s Day!
I was a skeptic of drinking my greens until recently, and now I’m hooked. For the fellow skeptics, start with just a few greens and then slowly add more each time. We’ve been aiming for a ratio of half vegetables and half fruits, with most of the vegetables being leafy greens. Many people ask, “Why smoothies instead of juice?” I have two main related reasons: less waste and easier clean-up. I like knowing that I’m getting all the nutritional benefits of the whole fruit and vegetable. Also, I hate cleaning up. The vitamix blender I use has a clean setting, so all I have to do is rinse out the soap at the end. Any variation of this smoothie makes for a very filling breakfast or snack.
Today’s smoothie included the following ingredients, many of which were available at this morning’s farmer’s market. It’s fun and healthy to vary the ingredients daily, and pretty much any combination is good.
Ingredients:
- 1 cup kale (assorted)
- 1/4 cup vitamin greens
- 1 carrot
- 1 green apple, peeled and cut into quarters
- 1/2 cup frozen peaches
- 1 banana, chopped
Directions:
- Blend 2 cups of water with the kale and vitamin greens until you have a gorgeous green water.
- Put the rest of the ingredients in the blender and blend until smooth.
- Drink right away, or put some in the fridge for later or the next day.

This recipe came from Cooking Light magazine. It’s a perfect addition to a fall meal. It brightens up the plate and has a great flavor.
All of the herbs came from my garden. However, the cilantro was special. A few months ago in the heat of summer, I was frustrated that my cilantro kept bolting. I decided to let it flower and turn to seed so I could make my very own coriander seed. Once the plants got to the right point (for us, the right point was when we were sick of the constant swarm of bees who adored our cilantro flowers), I cut and then dried the plants in a paper bag. Then, I hung the bag inside for a few weeks. After a few weeks, I gave the bag a few shakes. Amazingly, there were some coriander seeds at the bottom of my bag. However, the yield was less than I hoped for: just a few tablespoons. I think I should have waited a bit longer to chop down the flowering cilantro before letting it dry.
Rather than save the coriander, I continued on with my experiment. I planted the coriander a few inches deep in the empty pot that used to house the cilantro. A few week later….little baby cilantro plants started popping up. I watered them gently at first. A few weeks later than that…carrot salad with a hit of heat features my very own “circle of life” cilantro. I know this is basic stuff to some people, but I was amazed that this process actually works.
Ingredients:
- 3 tablespoons extra-virgin olive oil
- 1 tablespoon fresh lemon juice
- 1 teaspoon sambal oelek (ground fresh chile paste)
- 4 cups coarsely grated carrot (about 1 pound)
- 3/8 teaspoon kosher salt
- 2 tablespoons chopped fresh cilantro
- 1 tablespoon minced fresh mint
- 1 tablespoon minced fresh chives (optional)
Directions:
- Combine first 3 ingredients in a large bowl, stirring with a whisk. Add carrot and salt; toss to coat. Let stand 30 minutes. Just before serving, add cilantro, mint, and chives, if desired; toss to combine.
