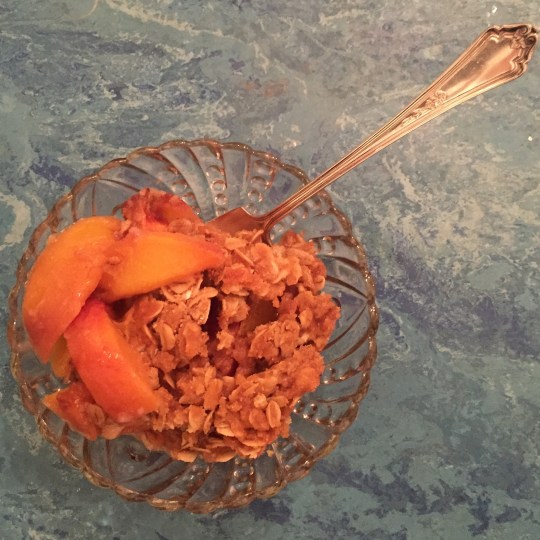
Looking for a perfect* summer dessert? Stop googling and start making this. This particular crisp was made from peaches purchased at Sweet Corn Charlie’s stand in Syracuse, Indiana. They were the kind of peaches that were begging to be eaten–perfectly fragrant and just soft enough that if we let them go another day they would have turned to mush.
This is a simple recipe with ingredients you might even have in your pantry and fridge. You can even make it ahead and keep it in the fridge until you are ready to bake it. The hardest part is remembering to turn on the oven before dinner so you can pop the crisp in the oven while you eat. My suggestion is to serve it with some vanilla ice cream**, but then again my suggestion is to always serve everything with some vanilla ice cream. Thanks to T for creating this with me and remembering that very important step to turn the oven on. This recipe comes from All Recipes.
*By perfect I mean one that does not take your time away from having lots of summer fun outside.
**That is, unless you already had a root beer float 2 hours earlier because you were trying to fit an entire summer into one day.
Ingredients:
5-6 peaches, sliced
1/2 c all purpose flour
1/2 c brown sugar
1 stick of cold butter (1/2 c), cut into pieces
1 c rolled oats
1 t ground cinnamon
1/4 t salt
Directions:
- Preheat oven to 350 degrees.
- Arrange peaches evenly in 8X8 baking dish.
- Mix flour, sugar, butter, cinnamon and salt in a bowl. Mix in the oats. Sprinkle and press topping into the peaches.
- Bake for 30 minutes, or until topping is browned.

Sometimes G goes on a ketchup, butter, and bacon diet, like at dinner last night.
Then I wake up the next morning and try to do some damage control.
Enter Greek Yogurt Ice Pops. Thanks to CB for the inspiration!
I used blackberries and peaches because that’s what was at the Carroll Gardens Farmer’s Market yesterday, but you can use any fruit/yogurt combination. Why not put in some greens, too?
We did rainbow pops last year without yogurt and those are just as delicious but in a different vegan sort of way. It depends on what you’re in the mood for. If you want to know more about these freezer molds, check out that post.
Ingredients:
1/3 cup Greek Yogurt (We love Wallaby)
a handful of blackberries (I used 5 large ones)
1 peach, peeled
1 teaspoon honey
1/2 cup water, more as needed
Directions:
Combine all ingredients in blender and blend until liquified. Add more water to thin as needed. Freeze for at least 4 hours. Enjoy!
BONUS: If you have a toddler, this human can help you with every step of this process. G especially liked putting the handles in the molds like a little puzzle.
The peaches this year have been delicious, and my only complaint is that we cannot eat them all before they spoil. So, I opened up Sherri Brooks Vinton’s preserving book: Put ‘Em Up! and got to work. This week’s preserving projects were Peach Salsa and Peach Leather.
Peach Salsa

Note: If you are planning on canning the salsa, read the information at the bottom of the directions first, since you need to prepare your materials ahead of time. Canning can be a daunting project when working solo. I recommend canning in a small group to ease the stress and add to the fun. Canning is a great way to enjoy the bright flavors of summer in the dead of winter. If you plan on eating or sharing the salsa within a week, no need to can it.
Ingredients
- 3 pounds peaches
- 1 cup cider vinegar
- 1 cup brown sugar, lightly packed
- 1 tablespoon ground cumin
- 1 tablespoon salt
- 1 pound tomatoes, cored, seeded, and diced
- 1 red bell pepper, diced
- 1 jalapeno pepper, diced
- 1 red onion, diced
- 1/4 cup minced fresh cilantro (which I went through the trouble of mincing and then forgot to add it before canning..oops!)
Directions
- Prepare an ice-water bath in a large bowl.
- Bring a large pot of water to a boil. Working in batches of 2 at a time, blanch the fruit in the boiling water for 30 seconds to loosen the skins.
- Scoop the peaches out of the water and plunge them into the ice-water bath. Repeat with the remaining peaches. Drain.
- Combine the vinegar, brown sugar, cumin and salt in a large nonreactive pot. Using a small paring knife, peel, pit, and dice the peaches, adding them to the pot as you go to prevent browning. Add the tomatoes, bell pepper, jalapeno, and onion, and bring to a boil. Reduce the heat and simmer until thickened, about 15 minutes. Add the cilantro (!) and remove from the heat.
- At this point, you can simply ladle the salsa into bowls or jars, and refrigerate for up to a week, covered. OR—You can CAN them so they can stay in the pantry for up to a year. Keep reading to find out how>>>
Canning the peach salsa:
You will need:
- Canner (or large pot with layer of jar rings on the bottom, thread side down) Your container should be large enough that there is at least 2 inches of space above the height of the cans.
- jars (I used 3 pint jars for this recipe, and there was some salsa leftover to eat right away. You can also use double the amount of half-pint jars, as they will require a shorter canner.) You will need extra jars to fill up the canner, so the cans do not tip while processing.
- jar lifter
- jar rings–you can reuse these; just make sure they are clean and free of rust
- jar lids (may only be used once for canning)
- canning funnel
- bubble tool or chopstick
- clean kitchen towels and several paper towels
- Right away, get the canner filled up with water–enough to cover the jars– and heat it up with the lid on. It will take a while to bring to a boil, and you want it to be ready while the salsa is still hot so you can do a hot fill.
- Run the jars in the dishwasher to ensure they will be clean and piping hot when the salsa is ready to go.
- Wash the lids and place them bottom-side down in a small heat-proof bowl. If you don’t have/don’t want to use a dishwasher, you can bring the jars to a boil in the canner once to get them nice and hot.
- Prepare the recipe as outlined above.
- Lay out a clean kitchen towel and have all our equipment nearby.
- Using the canning tongs, remove a jar from the canner, and carefully tip the hot water into the bowl with the jar lids so their sealing rings begin to soften. If your jars were in the dishwasher, just pout hot water over the lids–you can ladle some from the canner.
- Use the canning tongs to remove additional jars from the canner, emptying the water directly back into the canner and placing them, open side up, on a clean kitchen towel.
- Use the canning funnel to fill a jar with the hot salsa, leaving 1/2 inch of headspace.
- Release trapped air with your bubble tool or chopstick.
- Wipe the rim clean with a paper towel, center lids on the jars and screw on the ring until it is finger-tip tight (not knuckle!)
- Repeat steps 7-10 with remaining jars.
- Use the canning tongs to lift the filled jars (be careful not to tip them) and lower them into the canner, being sure they are covered by 2 inches of water.
- Cover the pot and bring the water to a rolling boil. Lower the heat a bit, so the water isn’t rolling out of the pot by still maintains a lot of rolling action. Start timing 15 minutes after the full boil is reached.
- After 15 minutes, turn off the heat and remove the lid from the canner.
- Let the jars cool in the canner for 5 minutes. This way they won’t spurt at you!
- After 5 minutes, use the canning tongs to lift the jars STRAIGHT out of the canner. Do not tip them!! Place them on a clean dish towel-covered counter.
- Let cool overnight. You will need to tighten the jars again. Store them in a cool, dark place for up to one year.
Here are some helpful resources on canning:
http://www.canningusa.com (detailed videos/tutorials)
http://sherribrooksvinton.com: Sherri Brooks Vinton’s site
****************
Peach Leather

Ingredients:
- 2 pounds peaches
- 1 cup water
- 2 tablespoons bottled lemon juice (I used freshly squeezed lemon juice, but that might explain my uneven results)
- 1/4 cup sugar
Directions:
- Prepare an ice-water bath in a large bowl.
- Bring a large pot of water to a boil. Working in batches of 2 at a time, blanch the fruit in the boiling water for 30 seconds to loosen the skins.
- Scoop the peaches out of the water and plunge them into the ice-water bath. Repeat with the remaining peaches. Drain. Using a small paring knife, peel, pit, and roughly chop the peaches.
- Bring the peaches and 1 cup water to a boil in a medium nonreactive saucepan (I used stainless steel). Simmer until they begin to break down, about 5 minutes. Remove the fruit from the heat, let cool slightly, and puree with a traditional blender or stick blender, or by running it through a food mill.
- Preheat the oven to 170 degrees F. Line a jelly roll pan or a rimmed baking sheet with parchment paper or a silpat and set aside.
- Return the puree to the pot and simmer over low heat, stirring frequently, until it thickens to the consistency of baby food. Add the lemon juice and sugar and stir to dissolve.
- Spread the puree on the baking sheet, tilting it to create an even layer about 1/8 inch thick. Dry in the oven until tacky to the touch, about 2 hours. *
- Cool to room temperature. Slide the parchment onto a cutting board and roll the leather into a tube. Slice the tube into 2-inch segments and store in a covered jar for up to 1 month.
*My puree took much longer than 2 hours before it turned tacky, and when it did turn tacky it did so unevenly. Next time, I will try to spread it in a thinner layer, and make sure it is as even as possible. Also, I will try to use bottled lemon juice as this may have caused the problem, too. I’d love to hear how yours comes out!
