

Here’s a great way to get creative with your bumper crop of cucumbers, and it takes only 10 minutes from garden to plate. I used a mandolin for maximum beauty and because I like to live on the edge. Thanks to Karen Solomon and her book Jam It, Pickle It, Cure It for this and so many other fun kitchen ideas.
Ingredients:
1 large cucumber – sliced thin
1 small red onion-sliced thin
2 teaspoons brown rice syrup (or sugar or your sweetener of preference)
2 teaspoons kosher salt
1/2 cup unseasoned rice vinegar
Mix all ingredients together and let sit for 30 minutes. It can be refrigerated for 2 days.

It was a cool day at the lake today, so we headed to The Berry Patch in Etna Green, Indiana for blueberry picking. This jam became the perfect highlight of this colorfully festive blueberry and ricotta crostini which can be made in less than 30 minutes from beginning to end. Add a strawberry or raspberry for an additional color and you have a perfect snacketizer for the 4th of July.
Ingredients: (this makes about 3/4 cups jam when cooked)
2 cups blueberries
1/2 cup sugar
1/2 T lemon juice
Heat all ingredients in a saucepan over medium heat, stirring frequently until thickened. You know its ready when is starts to stick to the spoon and your toddler is screaming that he wants some NOW!
For the crostini, simply broil some slices of french bread in the oven. Then get creative with decorating with ricotta cheese, blueberry jam, and your red berry of choice.

Local CSAs are starting this week and so some friends inspired me to start up again. Thanks, MK and JG!
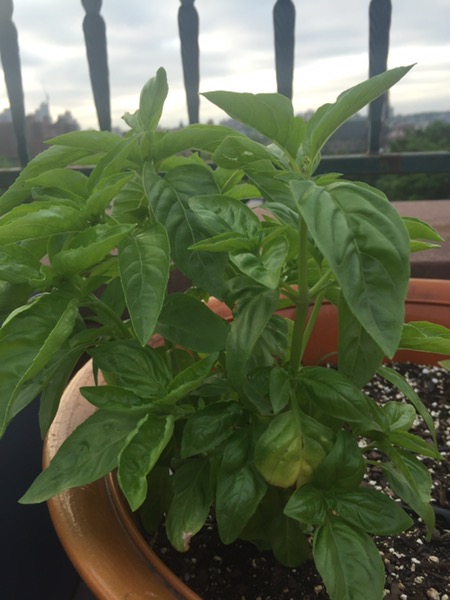
This year the theme of the garden is food that doesn’t need to be cooked. Basically, we’re growing a salad. Take a look!
Bell and jalapeños

Cherry tomatoes

Lettuce and spinach

Basil
Look! Our first sugar snap pea arrived. Isn’t she/he adorable?

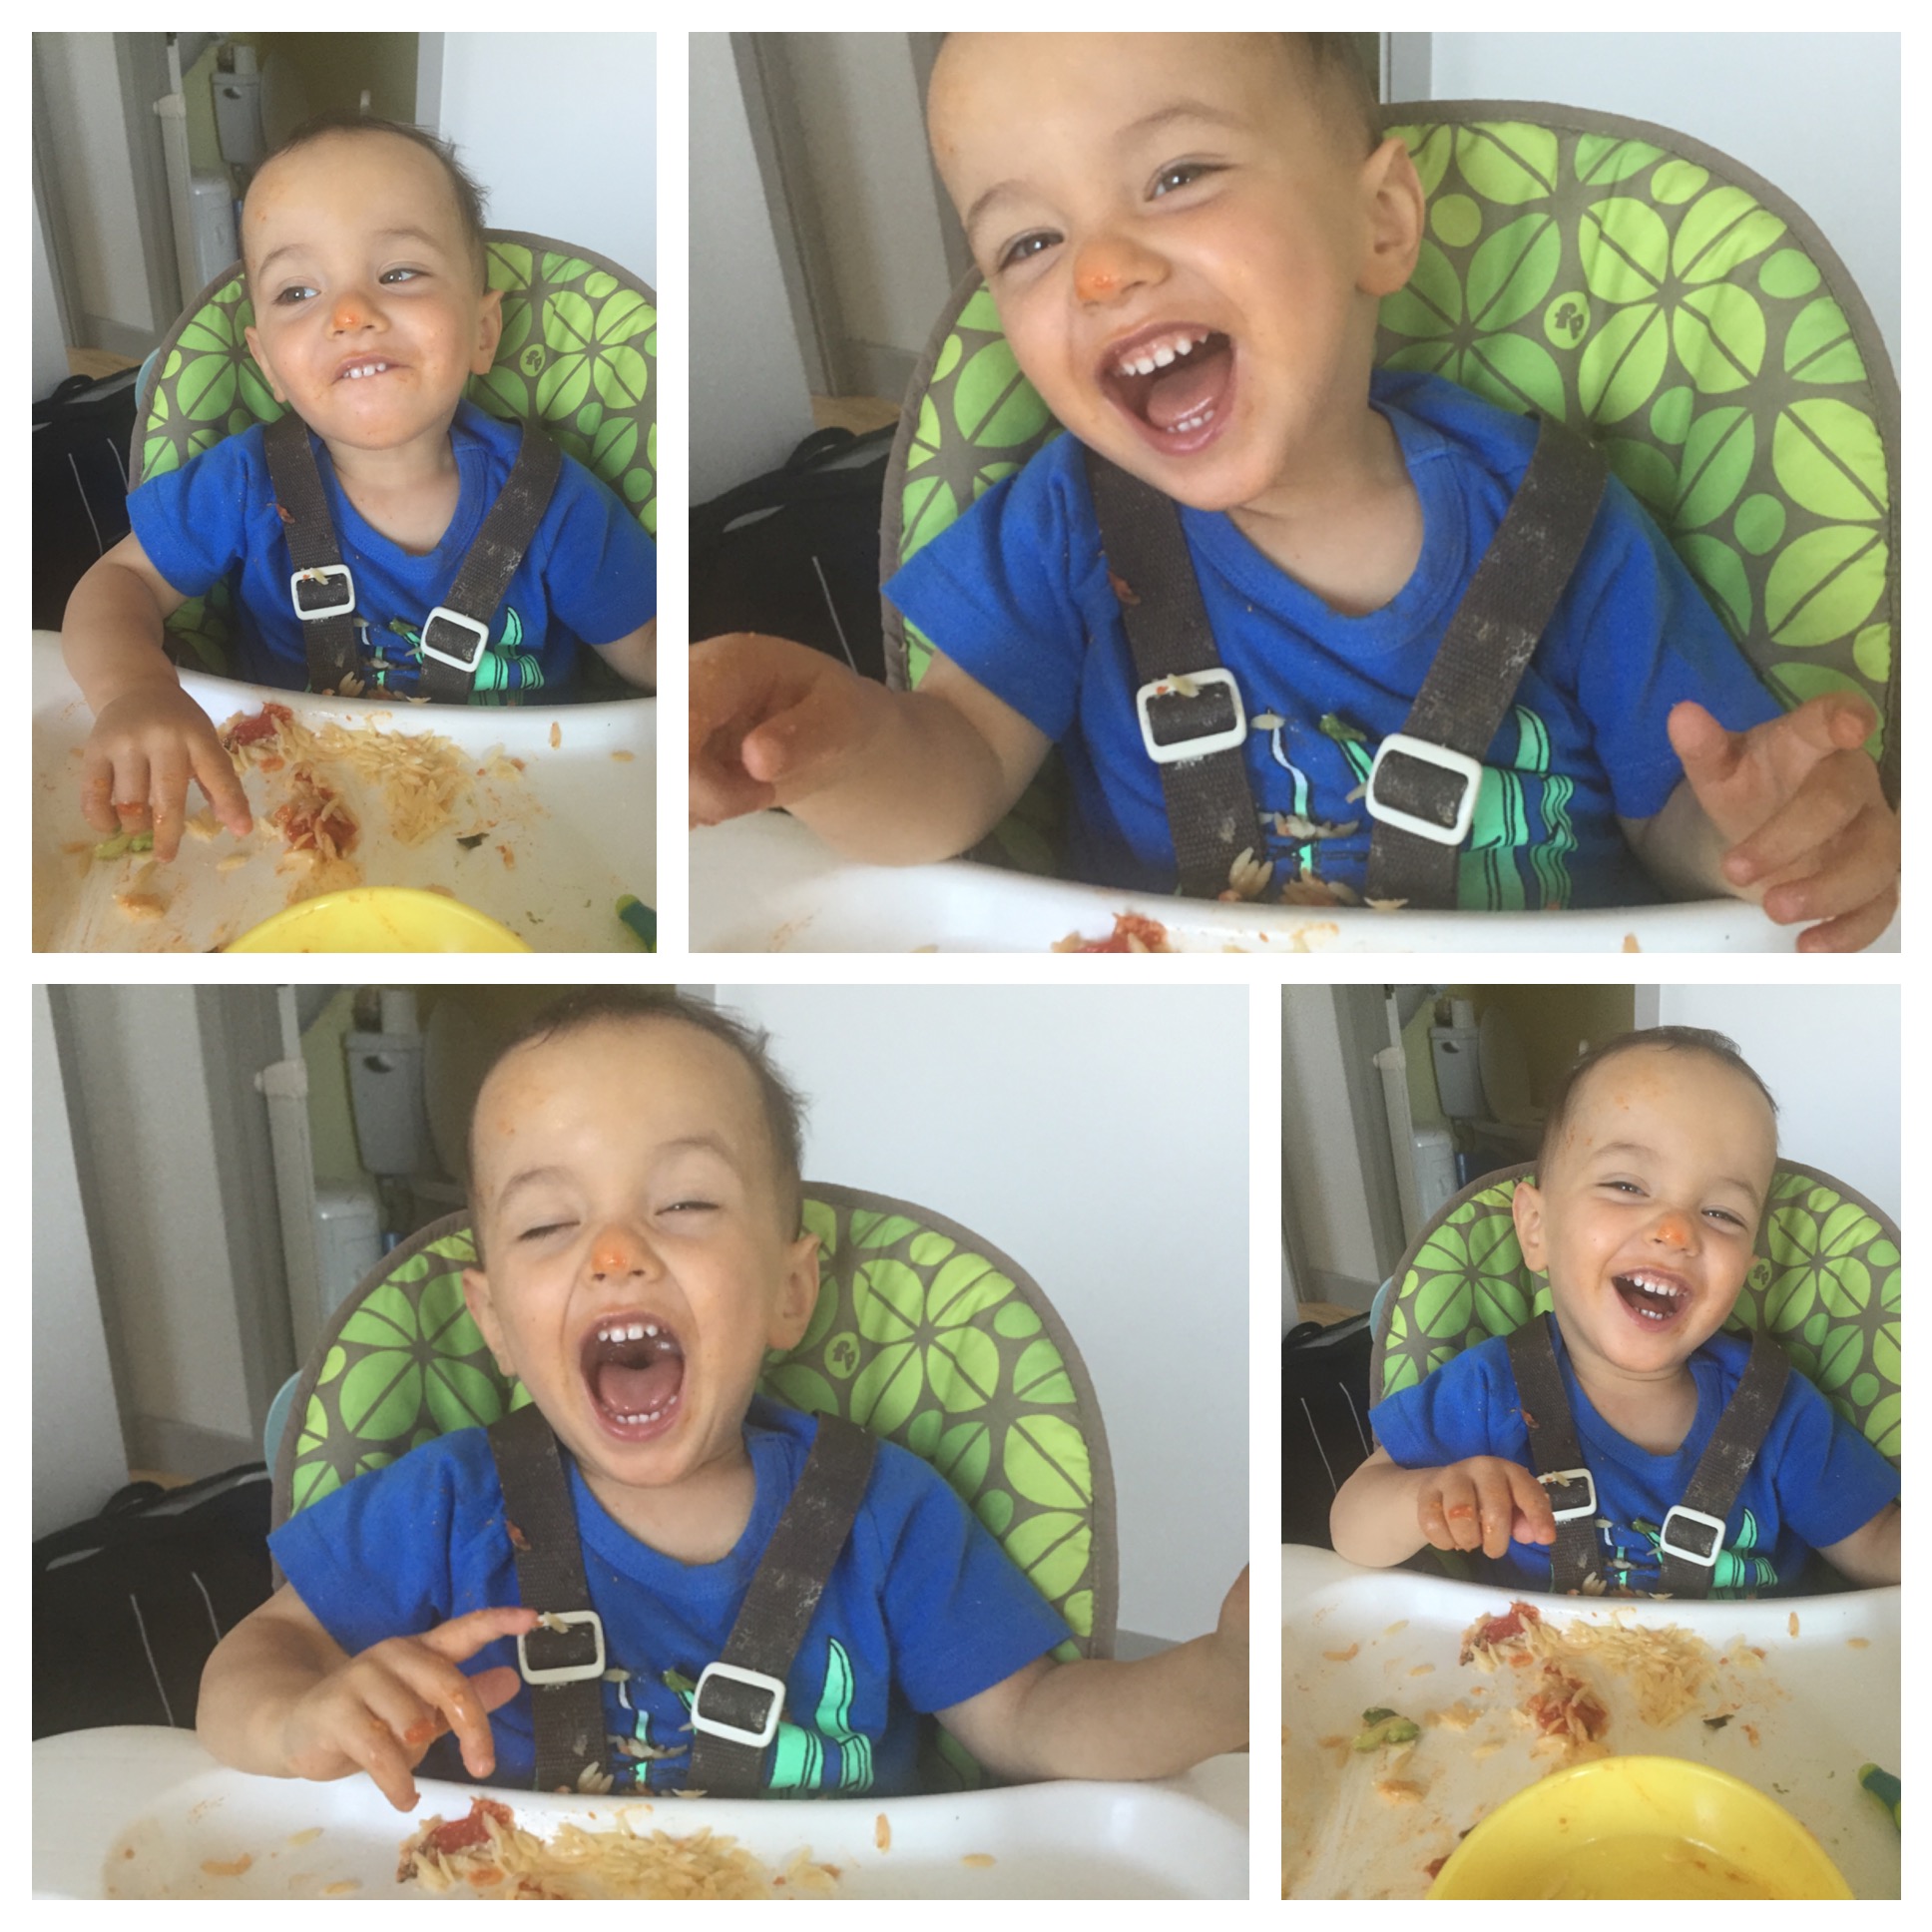
The garden is exploding with cherry tomatoes, and this recipe is a quick way to turn them into a warm meal. The sauce is spectacular over pasta (I used orzo with the kiddo and he liked that texture more than other pastas), and it can also be used as a spread on crackers.
Ingredients (all measurements are approximate–adjust any ingredient to taste):
1 tablespoon olive oil
1 cup cherry tomatoes
1 tablespoon minced onion or shallot
1 clove minced garlic
pinch of salt-optional
pinch of sugar-optional
8-10 torn basil leaves
1 tablespoon parmesan cheese-optional (Really isn’t everything optional? These are all merely suggestions!)
Directions:
- Heat oil in large skillet over medium heat
- Once the oil is hot, add the onions and cook for 2-3 minutes, stirring a few times.
- Add the garlic and cook until fragrant (30 seconds to a minute), stirring constantly.
- Add the cherry tomatoes (you can add them whole) and use a fork or spatula to squish them. If you want to have less fun, you can always cut them in half or quarters prior to putting them in the skillet, but squishing them while I go is my preferred method–just remember to wear an apron or some other sauce-friendly shirt)
- Once all tomatoes are squished, lower the heat to medium-low and continue to simmer and stir until it thickens a bit. If it is sticking a lot, add a few spoonfuls of water.
- Add salt and sugar to taste, if using.
- Once it seems like a sauce-consistency, throw in the basil, stir it up, and turn off the heat
- Pour the sauce on your favorite pasta and sprinkle with parmesan cheese.
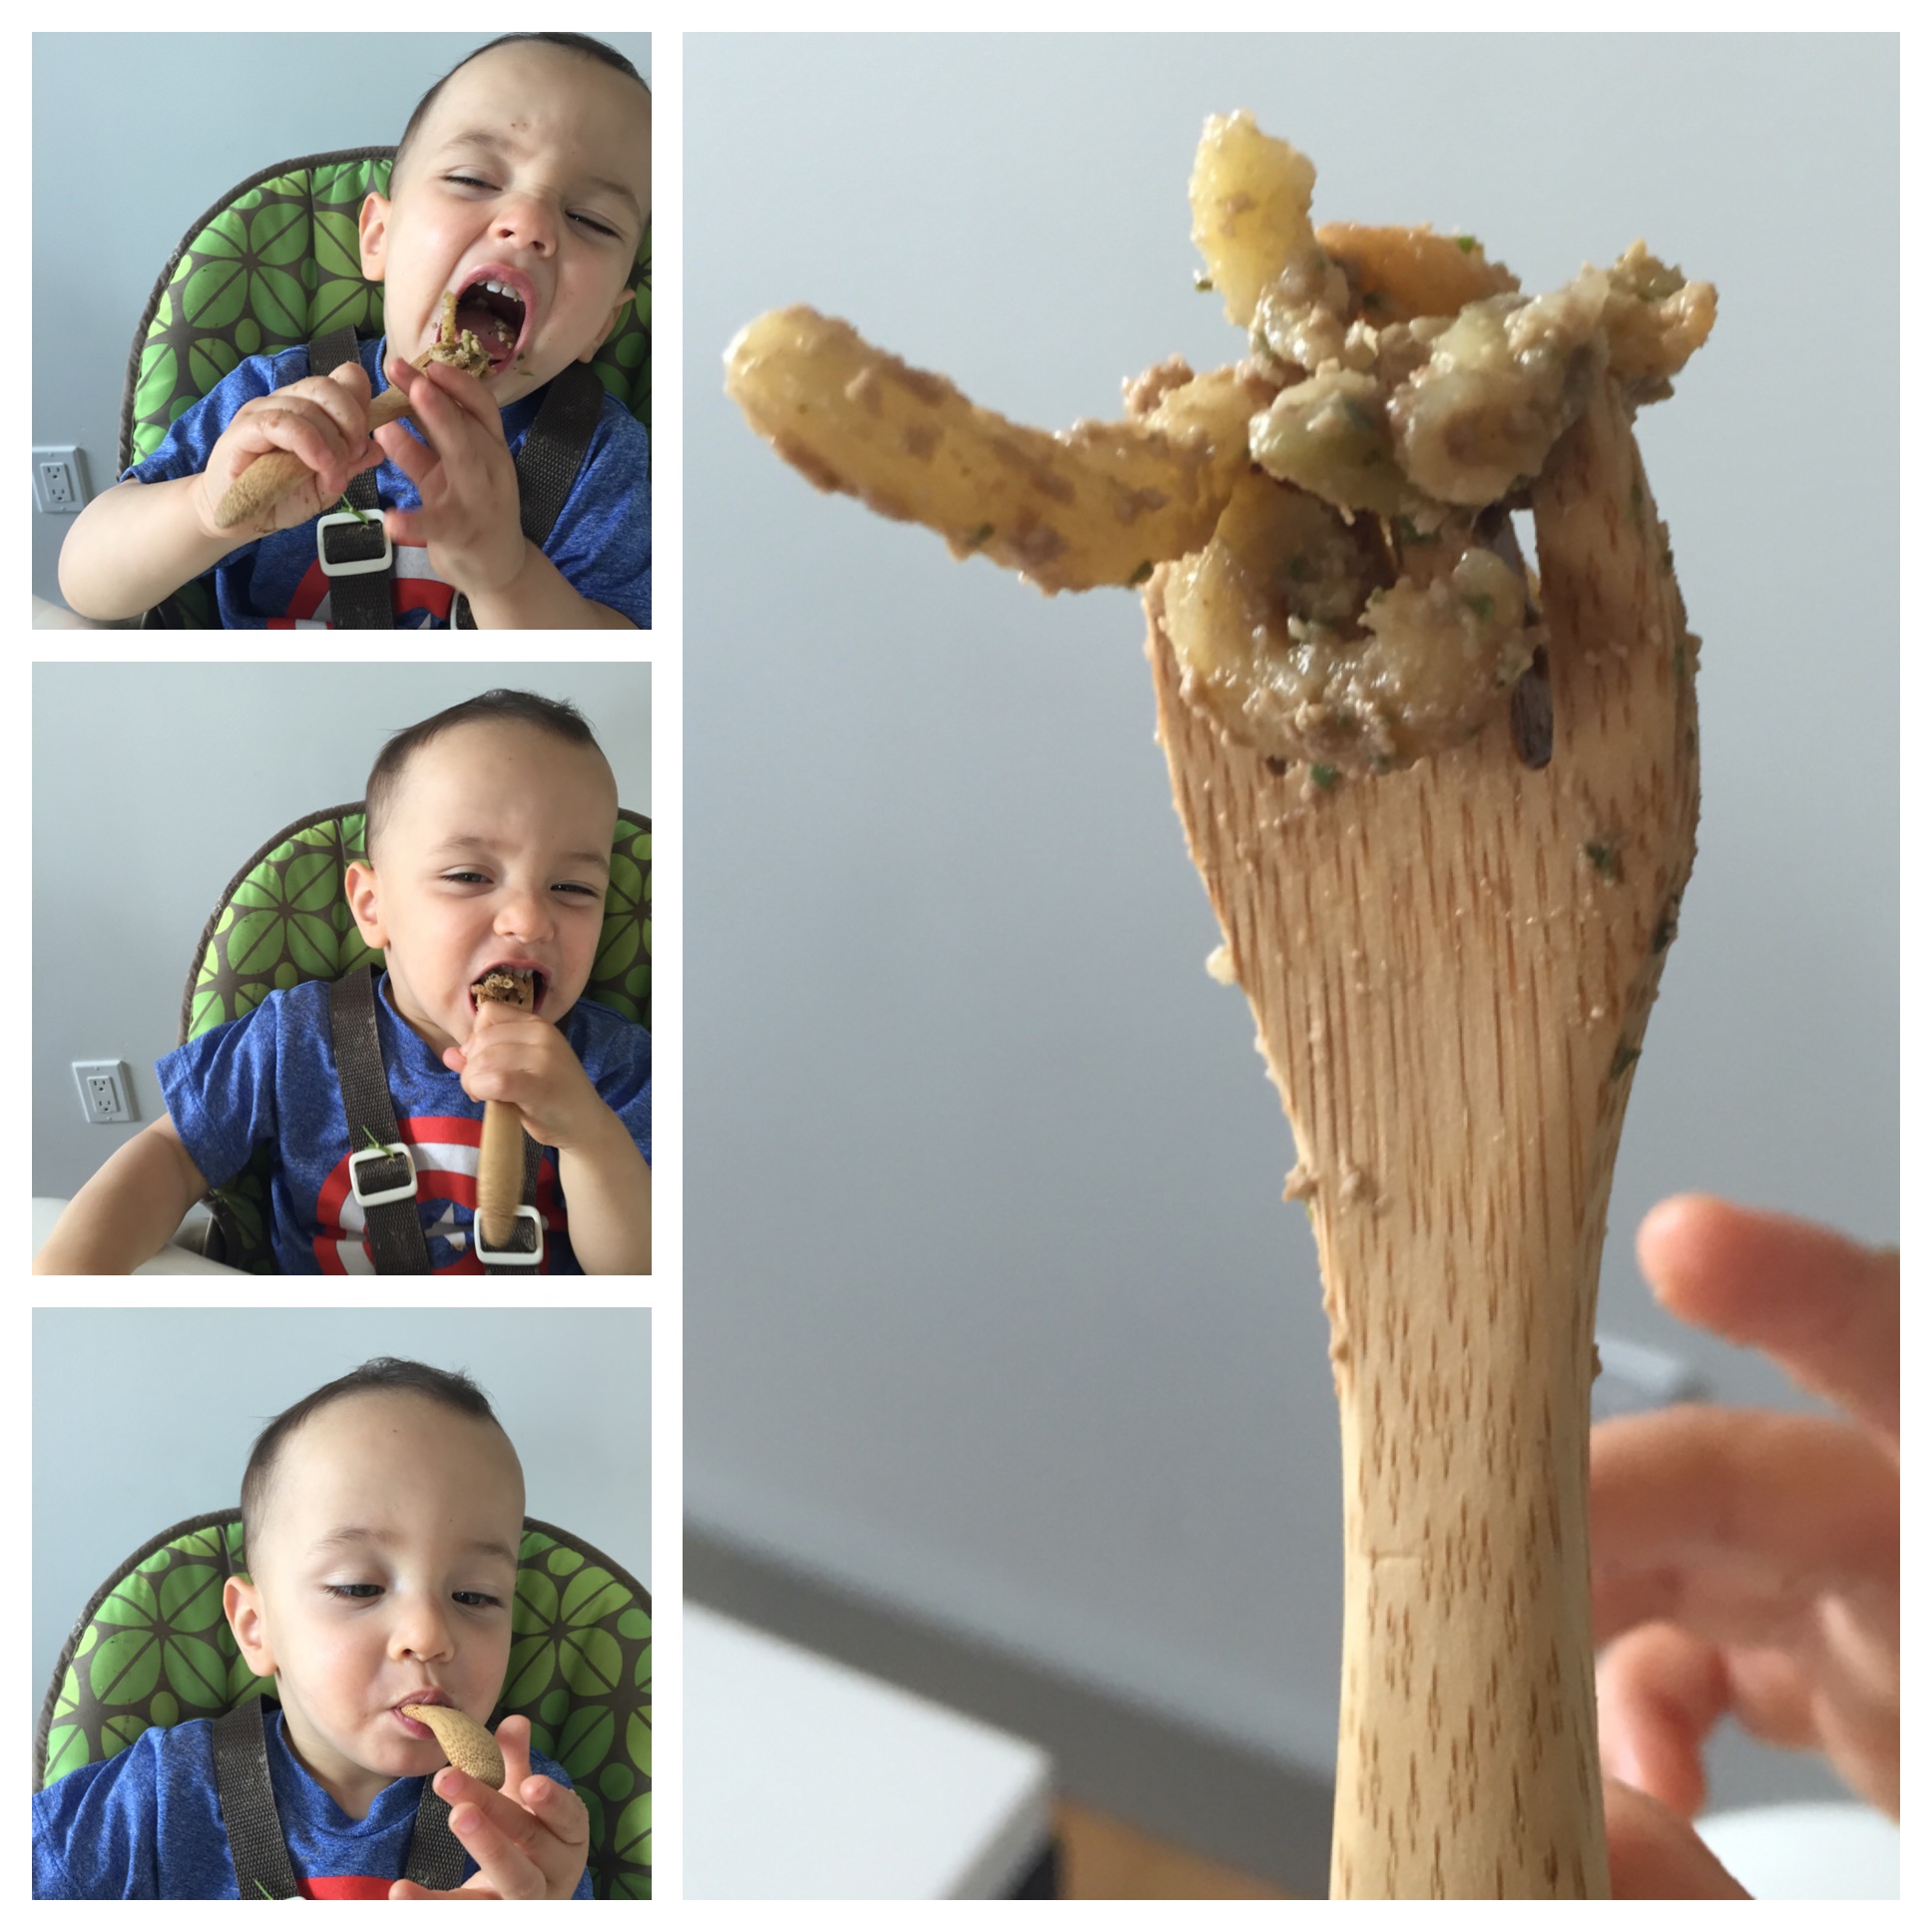
Fellow cheese lovers, don’t despair. You will not miss the parmesan in this pesto. The trick here is to soak the cashews for at least four hours so they become velvety smooth when pureed. You can freeze the extra pesto in small batches such as ice cube trays.
I used Ancient Harvest quinoa pasta, and I highly recommend it.
For the record: My child, who refuses chicken nuggets and even mac-n-cheese from a box, could not get enough of this pasta today. Maybe it was the fact that I let him hold a fork, but I like to think that he just sometimes chooses to go vegan and gluten-free.
Thanks to Farm to Harlem for the cooking inspiration!
Ingredients:
Quinoa pasta (I used Ancient Harvest veggie curls)
1-2 cups of basil
1/2 cup cashews (soaked in warm water for at least 4 hours or overnight)
1 small clove of garlic (or 1/2 clove-your preference)
olive oil
salt and pepper
Directions:
1. Get the water boiling for the pasta and follow the directions on the box. (sometimes I forget to start the water for pasta so here’s a friendly reminder!) NOTE: reserve a bit of the cooking water from the pasta.
1. In a blender, puree the cashews until smooth. Add water so that it becomes the consistency of smooth peanut butter.
2. Add the basil and garlic to the blender and pulse a few times.
3. With the lid of the blender closed and the blender running, slowly add the oil through the hole in the top. Stop as needed to scrape down the sides of the blender. If you feel like you added a lot of oil already, switch to a few spoonfuls of water.
4. Add a few pinches of salt and pepper and pulse a few more times to combine.
5. Top a small amount of this sauce on hot pasta. A little bit goes a LONG way so start with one teaspoon at a time. Add some of the pasta’s cooking water so that it will mix more easily.
 To celebrate the historic SCOTUS ruling, let’s enjoy these rainbow fruit and vegetable pops. I love berry season, but fresh berries have such a short shelf life. This technique preserves the fleeting berrylicious flavors of early summer. As an added bonus, these are made with raw kale and carrots too. You can use any combination of fruits and vegetables that you happen to have around. Let me know if you have any favorite combinations! Here’s what you do: Put the following in a high-powered blender: -handful of blueberries -handful of strawberries -handful of frozen chopped kale -handful of carrots -1 cup of water Blend on high until smooth, adding water as needed until it liquifies. The consistency should be quite thin. Pour into ice-pop molds and freeze overnight (the ones pictured are made by munchkin and make the perfect size for little ones. However, we still cut the pop into little pieces for our little munchkin–its just less messy that way). Enjoy!

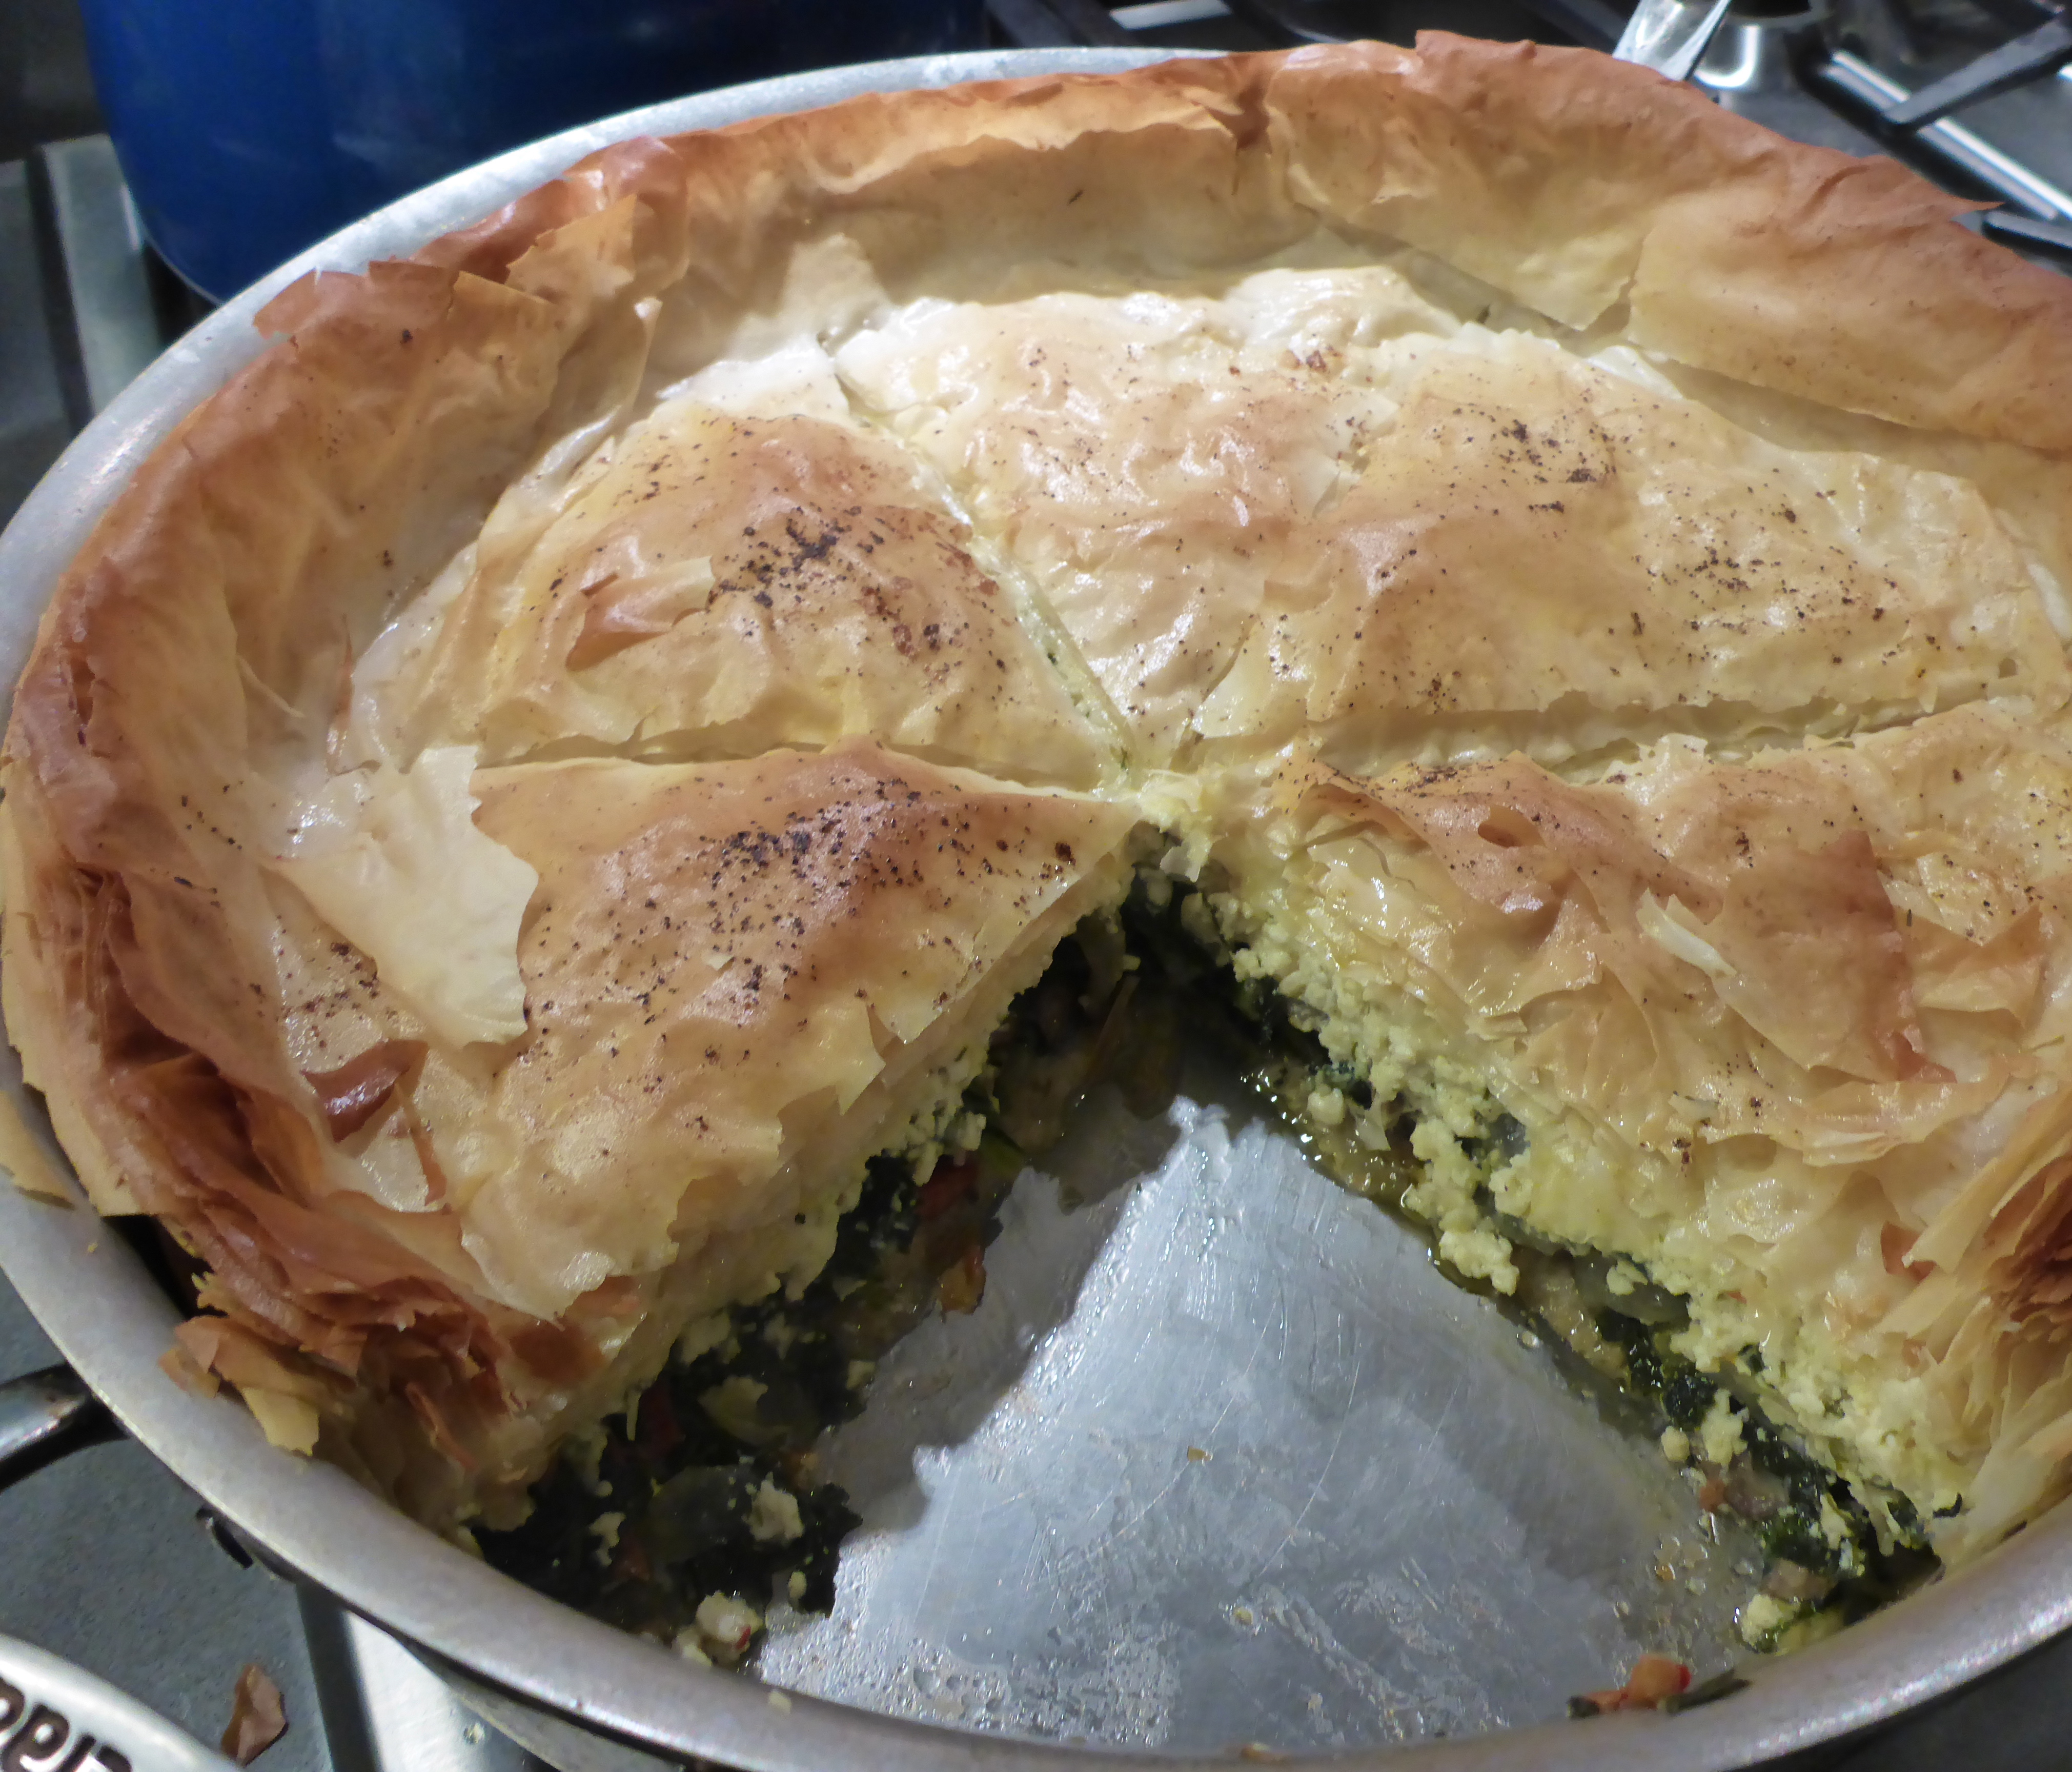
This substantial pie will fill up even the hungriest of people, and it looks pretty, too. The phyllo is intimidating at first, but then you just smother it in butter and know that everything is going to be OK.
Thanks to Peter Berley’s The Flexitarian Table for this recipe. (also found on epicurious)
Ingredients:
TOFU:
1 pound extra firm tofu
zest of 1 lemon
1/3 cup fresh lemon juice
1/4 cup olive oil
3 tablespoons chopped fresh dill
3 garlic cloves, mashed
pinch of red pepper flakes
sea salt
VEGETABLES:
1 1/2 pounds kale or other leafy winter green
2 tablespoons olive oil
1 1/2 cup onion, thinly sliced
12 ounces crimini mushrooms, thinly sliced
1/3 cup sun-dried tomatoes, thinly sliced
8 tablespoons butter
8 ounce package phyllo, thawed (I used an entire 16 oz package, but a lot gets trimmed off the edges at the end.
paprika for dusting
Directions:
VEGETABLES:
1. Steam greens for 3-4 minutes, until they turn a bright green. Drain, and set aside to cool. Carsely chop once they are cool enough to handle.
2. In a large skillet, heat oil over medium-high heat. Add the onions, cook until browned around the edges, 3-4 minutes.
3. Add mushrooms and season with salt and pepper. Increase heat and cook, stirring until mushrooms caramelize, about 5 minutes.
4. Stir in greens and sun-dried tomatoes. Remove from heat.
TOFU:
1. Mash the tofu in a bowl.
2. Add rest of ingredients, stir until combined and set aside.
TO ASSEMBLE PIE:
1. Brush a 10 inch spring form pan or pie dish with butter. Place 5 sheets of phyllo down, brushing with butter between each layer. The extra pieces that hang over can be trimmed off at the end, or folded over.
2. Spread the vegetable layer, and cover with 2 more phyllo sheets, buttered in between.
3. Spread the tofu layer and top with 8-10 more phyllo layers, again, brushing with butter between each layer.
4. Brush top with butter. Lightly score top into 6 slices, taking care to only cut phyllo layer. Sprinkle with paprika.
5. Bake until browned, about 35 minutes. Let cool for 5 minutes before serving.

I made this coleslaw for Father’s Day and have looked forward to having it a snack every day since. It’s a perfect food to bring to a 4th of July BBQ or picnic because it can be prepared ahead of time. The magical thing about this coleslaw is that even though we keep eating it, the bowl is still practically full. I’m not really sure what causes this phenomenon. It’s like the everlasting gobstopper of salads. Anyway, it took about 15 minutes to whip it up in the food processor, and I am grateful for that as well. If you don’t have a food processor handy, you can do all the slicing by hand…but it will be much more time-consuming. This recipe also came from Williams-Sonoma’s Salad of the Day book.
Ingredients:
- 1 head green cabbage (about 2 lb)
- 2 celery ribs
- 1 granny smith apple
- 1 small red onion
- 2 small carrots
- 2 T cider vinegar, or as needed
- 2 T minced fresh flat-leaf parsley
- 1 1/4 c mayonnaise
- salt and freshly ground pepper
Directions:
- Cut the cabbage through the stem end into wedges, and cut out the core. Using a food processor fitted with the thin slicing attachment, slice the cabbage into thin slivers. Transfer to a (very!) large bowl. Slice the celery crosswise in the same way and add it to the cabbage.
- Replace the slicing attachment with the shredding attachment. Halve and core the apple but do not peel. Cut the apple and onion into wedges. Shred the apple, onion, and carrots, and add to the cabbage and celery.
- Sprinkle the vegetables with the vinegar and toss to coat evenly. Add the parsley and mayo and mix well. Season with salt and pepper to taste. Cover and refrigerate until chilled, at least two hours. Taste and adjust the seasoning with more vinegar, salt, and pepper before serving. Serve chilled.

We’re back!
There’s nothing quite like the smell of freshly-cut mint and freshly-squeezed lemon to brighten up a kitchen after a long hiatus of take-out. One can only take so much pad thai.
This salad comes from the Williams-Sonoma Book, “Salad of the Day,” which I received over the holidays. I’m just getting around to testing it out now. Let’s just say things have been a little busy. Anyway, get that grill (or grill-pan for all you indoor cats) going and enjoy this spring salad!
Ingredients:
- 8-10 asparagus spears, tough ends trimmed
- 2 zucchini, cut on diagonal into slices 1/4 inch thick
- 1 tsp olive oil
- 1 1/2 cups bulgur wheat
For the Lemon Cardamom Dressing:
- 2 tsp grated lemon zest
- 2 tbsp fresh lemon juice
- 2 tsp ground cumin
- 1/2 tsp cardamom seeds, crushed (I just used ground cardamom)
- 2 tbsp extra virgin olive oil
- 1 cup canned chickpeas, drained and rinsed
- 2 green onions, including tender green parts, thinly sliced
- 1 bunch fresh mint leaves, minced
- 2 tbsp minced flat leaf parsley
Directions:
- Heat grill to medium.
- Put asparagus and zucchini in a heat-proof bowl, pour boiling water over to cover, and let stand for 2 minutes to soften slightly. Drain, let cool, and toss with the 1 tsp oil.
- When the grill is ready, put the bulgur in a heatproof bowl and add boiling water to cover by 2 inches. Let stand for 10 minutes. Meanwhile, grill the asparagus and zucchini, turning often, until lightly browned and crisp-tender, 4-5 minutes. Remove to a platter and cool slightly. Cut the asparagus spears on the diagonal into thirds.
- To make the dressing, in a bowl, whisk together the lemon zest and juice, cumin, turmeric, cardamom, 1 tsp salt, and several grindings of pepper. Add the 2 tbsp oil in a thin stream, whisking constantly until the dressing is smooth.
- Pour the dressing into a saucepan, add the chickpeas, and warm over medium heat for a couple of minutes, stirring occasionally.
- Drain the bulgur. Combine the bulgur, grilled vegetables, green onions, mint, parsley, and chickpeas with the dressing in a serving bowl and toss to coat evenly. Serve warm or at room temperature.
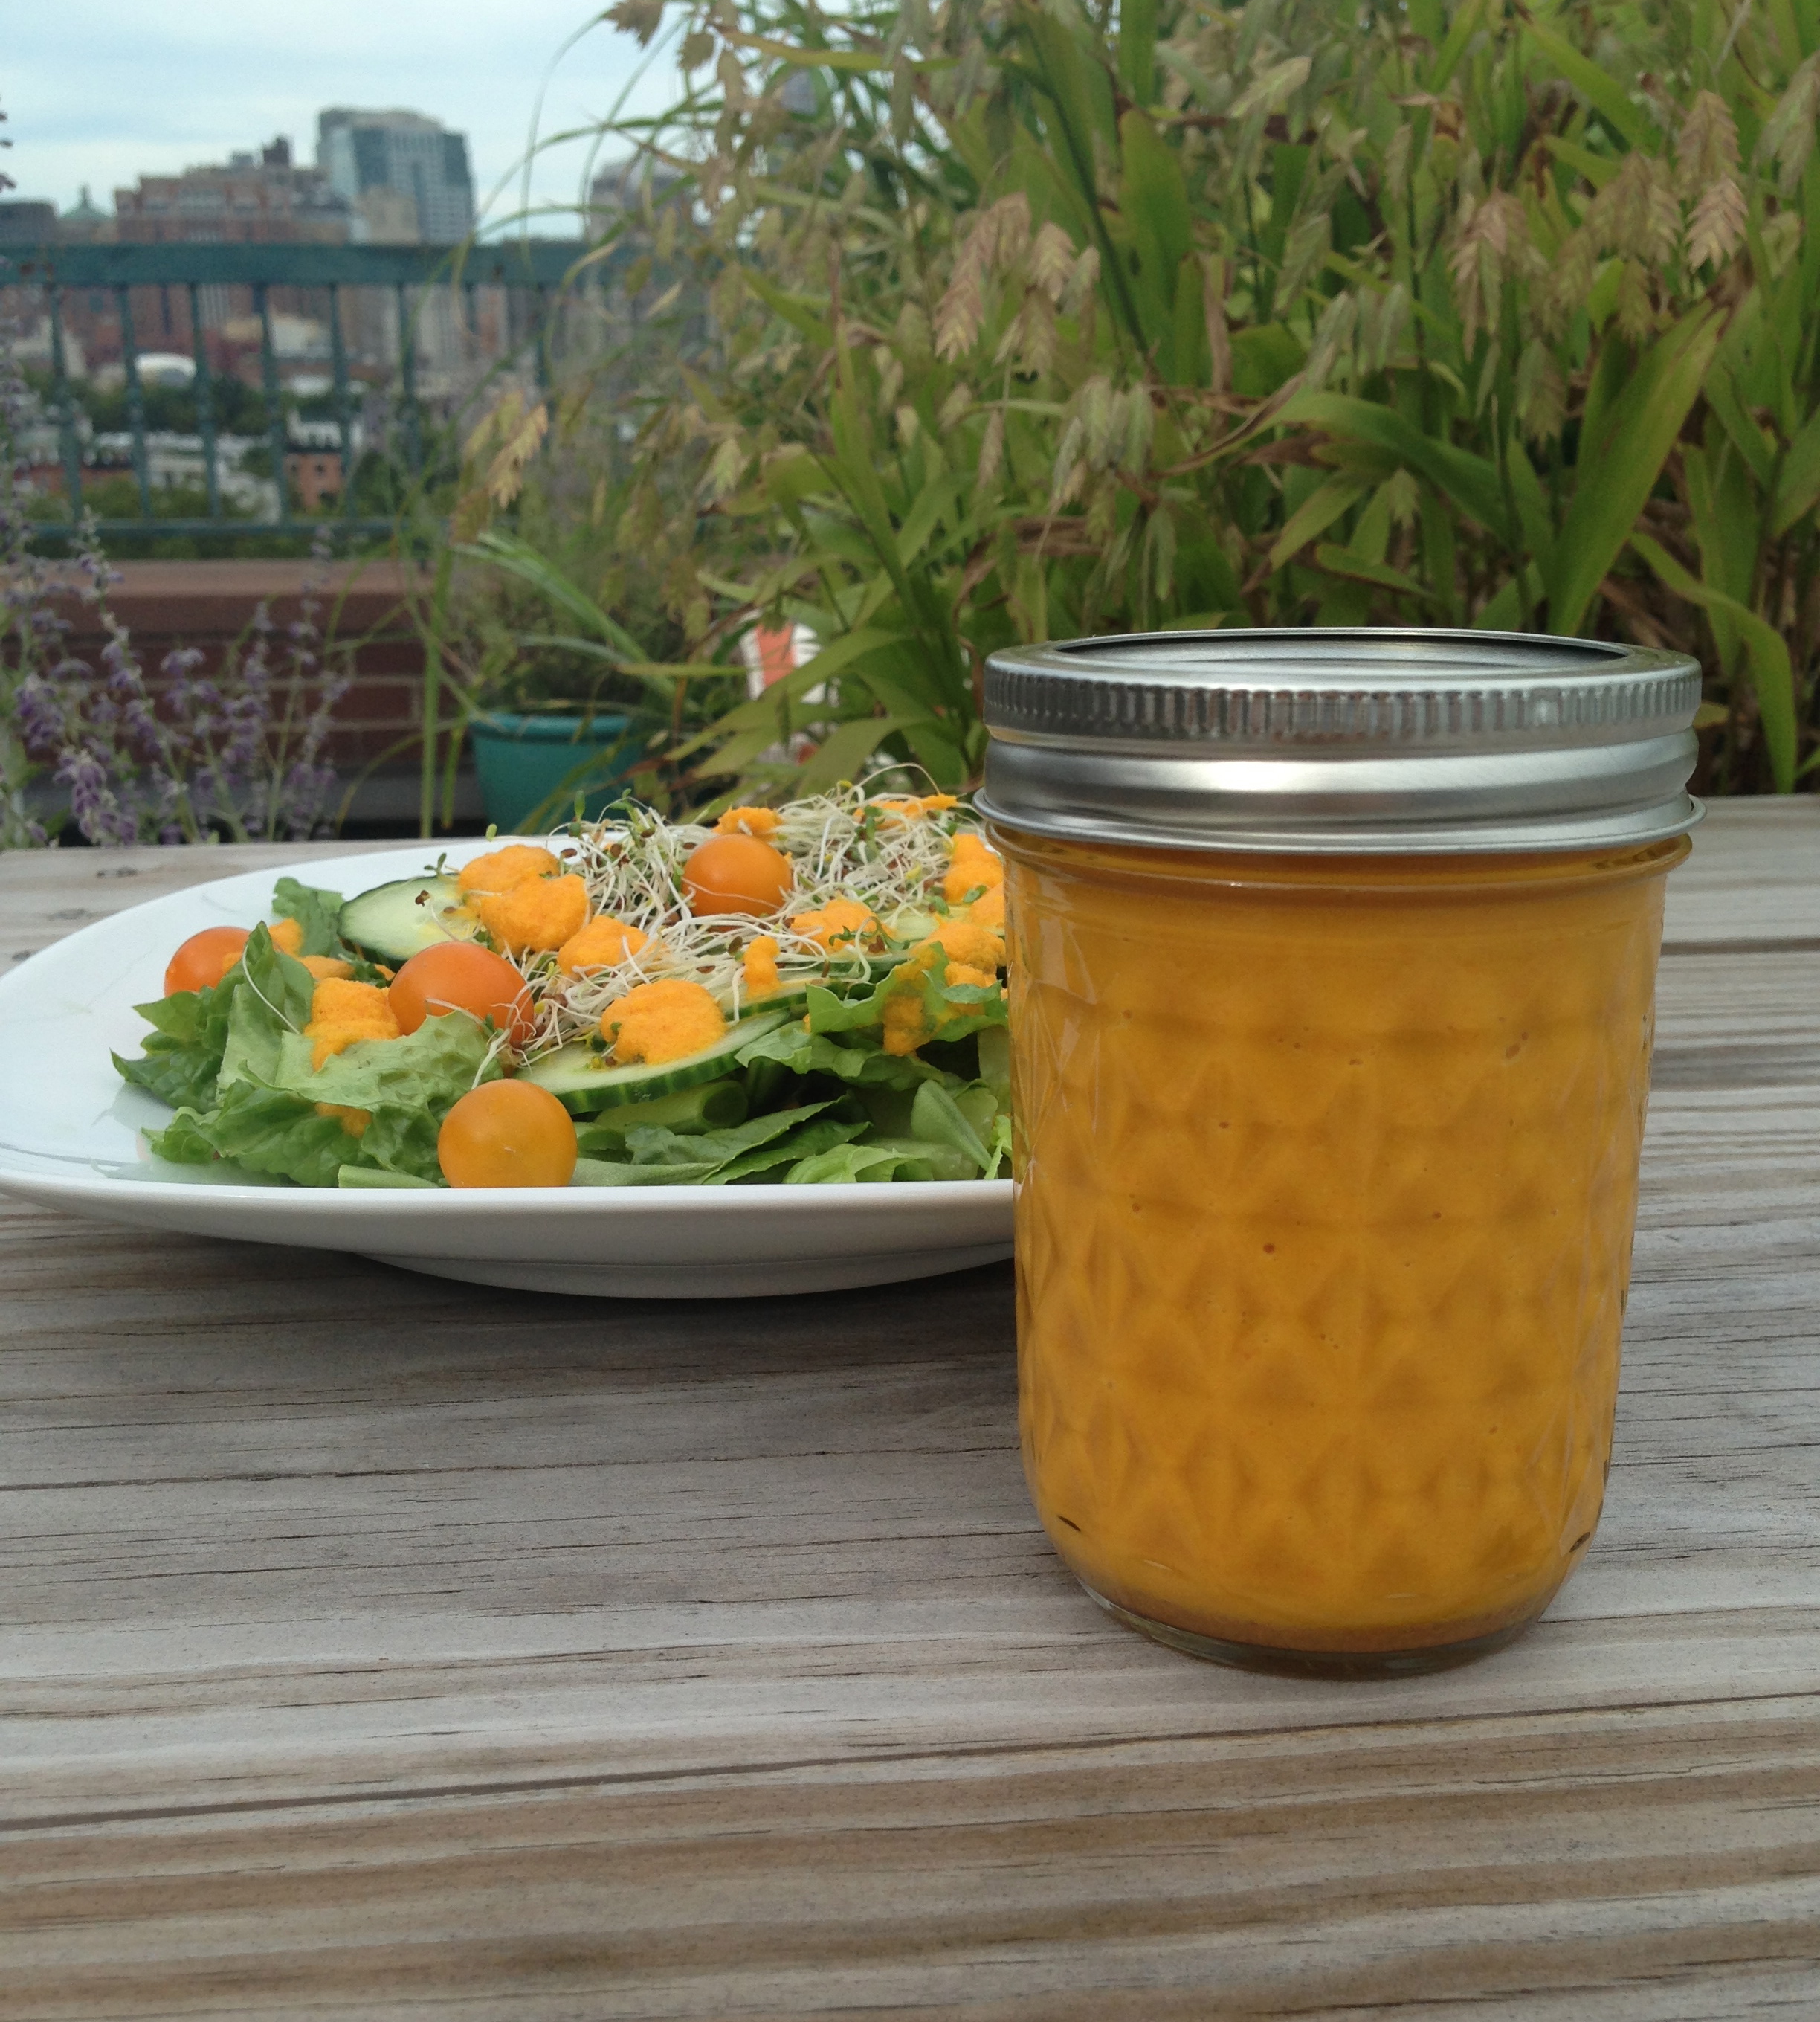
This Japanese-inspired dressing is good on top of most fresh vegetables. If you use less water, it can make a great dip, too. I used this recipe on Epicurious, and only adjusted the amounts of each ingredient. Also, rather than use both a food processor and a blender, I put all the ingredients in the Vitamix at the same time and blended for about a minute until smooth.
- 4 medium carrots, peeled
- 1/3 cup fresh ginger
- 2 shallots
- 1/3 cup rice vinegar
- 2 Tablespoons soy sauce
- 1 Tablespoon sesame oil
- 1/8 teaspoon salt
- 1/3 cup canola oil
- 1/4 cup water (or more to thin out as necessary)
It will keep in an airtight container in the fridge for a week or so. The salad in the picture has lettuce, roma beans, cherry tomatoes, sprouts, and thinly sliced cucumbers. I actually think a great appetizer would be thicker cucumber slices with a dollop of this orange gold on top.
