Warm Kale, Portobello, and Quinoa Salad with Basil and Shallot Vinaigrette – topped with toasted almonds
June 15, 2020
Let’s skip the small talk and get right to this salad-as-a-meal.
Ingredients
1 cup quinoa
1 package of baby kale, or a bunch of any kale will do
2 portabello mushrooms
2 cloves of garlic, minced
5 basil leaves
about 1/3 cup olive oil
1 shallot, minced
2 tablespoons red wine vinegar
1 teaspoon dijon mustard
1 teaspoon honey or brown sugar (or another sweetener of choice)
salt and pepper
Directions
- You’ll need to get your quinoa going first. Follow the package directions, or do it this way. I tend to use much less water than is recommended because let’s face it – soggy quinoa is gross: Boil 1.5 cups of water. Once it boils, add the quinoa, bring to a boil, and then lower to a simmer and cover for about 15 minutes.
- While that is happening, prepare your mushrooms. You can choose to scrape out the gills with a spoon (that’s what I like to do). Then, chop your portobello mushrooms into bite sized pieces. Toss it with a small amount of olive oil, the minced garlic, and some salt and pepper. Sauté over medium heat for about 10-15 minutes, stirring every few minutes, until they are very soft.
- Now that you have your hot food going, it’s time prep the kale. Your kale should be washed and drained. If not, do that. Then, roll it up into a tube and cut it into slivers. Put the kale in your big serving bowl.
- For the dressing, it helps to have a mini food prep. Chop up the shallot and toss it in there with 1/4 cup of olive oil, basil leaves, dijon mustard, red wine vinegar, sugar or honey, salt, and pepper. If you do not have a small food processor, you can just mince your pieces up really tiny and give it all a good whisk.
- By now, your mushrooms are probably ready and that is great because you don’t want to use a million pans. You can rinse the same pan you used for the mushrooms and toast up some sliced almonds on low in it for about 2-4 minutes, stirring frequently. Just watch them or they will burn! Remove from heat.
- Time to put it all together! Make sure your quinoa is dry enough. If not, drain it. Then, add the cooked quinoa and mushrooms on top of the kale. Stir it all together while it is still warm, and the kale will wilt a little. Add salt and pepper to taste.
- Top with toasted almonds.

I know – this is supposed to be a blog about vegetables.
But, there are TWO pandemics we are dealing with at the moment – so carbs are really the least you need to worry about. Do yourself a favor, and just make yourself some bagels this weekend.
Why bagels?
I have been away from my beloved borough for three months now, and have missed many things about it. While I cannot recreate so much of what I love (choosing which of many places to get coffee from on my walk to work, impromptu kid meet ups at Carroll Park, getting my shake on at a Bar Method class in the studio, saying goodbye to my children as I drop them off at school…) There is one thing I CAN control, and that is recreating the bagels I look forward to every week.
Thanks to Maple City Market, a wonderful gem of a store in Goshen, Indiana, I was able to find high-gluten flour, and that made these circles of joy possible.
I am not going to try to improve on Smitten Kitchen’s recipe, which I followed very closely (minus the barley syrup) Just go check it out. What I did do, however, is use some everything bagel seasoning – which you can find pretty easily these days in the spice section.
As Maui would say, YOU’RE WELCOME. (and I would know because I’ve listened to that soundtrack about 700 times this week.)
 I had some cauliflower in the fridge and homegrown tomatoes that would not last through the weekend, so this happened!
Toss some tomatoes and cauliflower with garlic, olive oil, salt and pepper. Roast until tomatoes turn saucy, stirring once or twice. Sprinkle with basil. Put it over some grains and/or put an egg on top. Maybe add hot sauce. Don’t measure or time anything because you’re trying to pack at the same time before the baby wakes up. Call it brunch.
I was on the quest to make the perfect jalapeño margarita – heavy on the spice and light on the sweet. Maybe you are, too? Great news! You can stop your search down the Internet rabbit hole and make these tonight. They were the perfect start to a summer night that included guacamole, jalapeño corn muffins, Mexican street corn “salad”, veggie fajitas with jalapeño cashew cream, fantastic friends, and Los Lobos.
While there were several components to this meal, the two highlights were the jalapeño margaritas and the vegan jalapeño cashew cream to top the fajitas. Pretty much everything was assembled in advance, which made for a quick turnaround from my kids’ bedtime to our first margarita. Vegan Jalapeño Cashew Cream post to follow. But first, margaritas…
Jalapeño Margaritas:

*Note – you can make the simple syrup and squeeze the limes in advance)
Put the following ingredients in a pint-sized mason jar or shaker and shake vigorously:
- Handful of ice
- 2 oz tequila
- 1/2 oz fresh squeezed lime juice
- 2 tsp Jalapeño Simple Syrup (one cup sugar, one cup water in a small saucepan and stir until sugar dissolves. Add 2 jalapeños cut inhalf and dump in the saucepan- bring to a boil and then lower the heat let simmer for 10-12 minutes, stirring every few minutes. Strain into a jar for storage and discard the jalapeños – or keep them in for a real kick?! I did it for about an hour while it cooled on the counter and then I took them out before putting the syrup in the fridge overnight)
- 1 tsp diced jalapeño
Then, prepare another glass – this one can be smaller: Use a lime wedge to coat the rim of the glass, and then gently dip in a shallow bowl of coarse salt. Fill that glass halfway with ice.
Use a small strainer to pour the liquid from the large container to the small container.
Garnish with a lime wedge and a jalapeño ring. Umbrella optional but recommended.

Looking for a perfect* summer dessert? Stop googling and start making this. This particular crisp was made from peaches purchased at Sweet Corn Charlie’s stand in Syracuse, Indiana. They were the kind of peaches that were begging to be eaten–perfectly fragrant and just soft enough that if we let them go another day they would have turned to mush.
This is a simple recipe with ingredients you might even have in your pantry and fridge. You can even make it ahead and keep it in the fridge until you are ready to bake it. The hardest part is remembering to turn on the oven before dinner so you can pop the crisp in the oven while you eat. My suggestion is to serve it with some vanilla ice cream**, but then again my suggestion is to always serve everything with some vanilla ice cream. Thanks to T for creating this with me and remembering that very important step to turn the oven on. This recipe comes from All Recipes.
*By perfect I mean one that does not take your time away from having lots of summer fun outside.
**That is, unless you already had a root beer float 2 hours earlier because you were trying to fit an entire summer into one day.
Ingredients:
5-6 peaches, sliced
1/2 c all purpose flour
1/2 c brown sugar
1 stick of cold butter (1/2 c), cut into pieces
1 c rolled oats
1 t ground cinnamon
1/4 t salt
Directions:
- Preheat oven to 350 degrees.
- Arrange peaches evenly in 8X8 baking dish.
- Mix flour, sugar, butter, cinnamon and salt in a bowl. Mix in the oats. Sprinkle and press topping into the peaches.
- Bake for 30 minutes, or until topping is browned.
 Are you tired of sautéing or steaming your green beans? Well, the temperature finally dropped below 80 degrees, so now is a great time to make some soup.
This is a protein-packed vegan soup with a mild flavor and very few ingredients.
Thank you to Chocolate & Zucchini for this wonderful recipe, which I adapted only a little bit based on what I had in my fridge this morning!
Ingredients:
3 tablespoons olive oil
1 onions, peeled and chopped
1 garlic clove, peeled and smashed
12 baby carrots, sliced
About a pound of green beans, rinsed and trimmed
salt and pepper to taste
1 cup vegetable broth
3 cups water
1.5 cups sliced almonds
Directions:
- Heat the oil in a medium heavy-bottomed soup pot. Add the onions and carrots, and cook over medium heat, stirring every now and then, until softened and very lightly golden. Add the garlic and stir for minute. Add the green beans to the pot, season with salt and pepper, and cook for 5 minutes, stirring from time to time.
- Pour in the broth and water, bring to a simmer, cover, and cook for about 20 minutes, until all the vegetables are soft. In the meantime, pour the sliced almonds in a dry skillet. Set over medium-high heat and toast for about two minutes, stirring constantly and watching closely, until golden and fragrant. Set aside in a bowl to prevent overtoasting.
- When the vegetables are soft, add the almonds to the pot and stir well. Remove from heat and let cool slightly. Use a high powered or immersion blender to mix all ingredients until velvety smooth. Taste, adjust the seasoning, reheat over gentle heat if necessary, and serve.

Sometimes G goes on a ketchup, butter, and bacon diet, like at dinner last night.
Then I wake up the next morning and try to do some damage control.
Enter Greek Yogurt Ice Pops. Thanks to CB for the inspiration!
I used blackberries and peaches because that’s what was at the Carroll Gardens Farmer’s Market yesterday, but you can use any fruit/yogurt combination. Why not put in some greens, too?
We did rainbow pops last year without yogurt and those are just as delicious but in a different vegan sort of way. It depends on what you’re in the mood for. If you want to know more about these freezer molds, check out that post.
Ingredients:
1/3 cup Greek Yogurt (We love Wallaby)
a handful of blackberries (I used 5 large ones)
1 peach, peeled
1 teaspoon honey
1/2 cup water, more as needed
Directions:
Combine all ingredients in blender and blend until liquified. Add more water to thin as needed. Freeze for at least 4 hours. Enjoy!
BONUS: If you have a toddler, this human can help you with every step of this process. G especially liked putting the handles in the molds like a little puzzle.
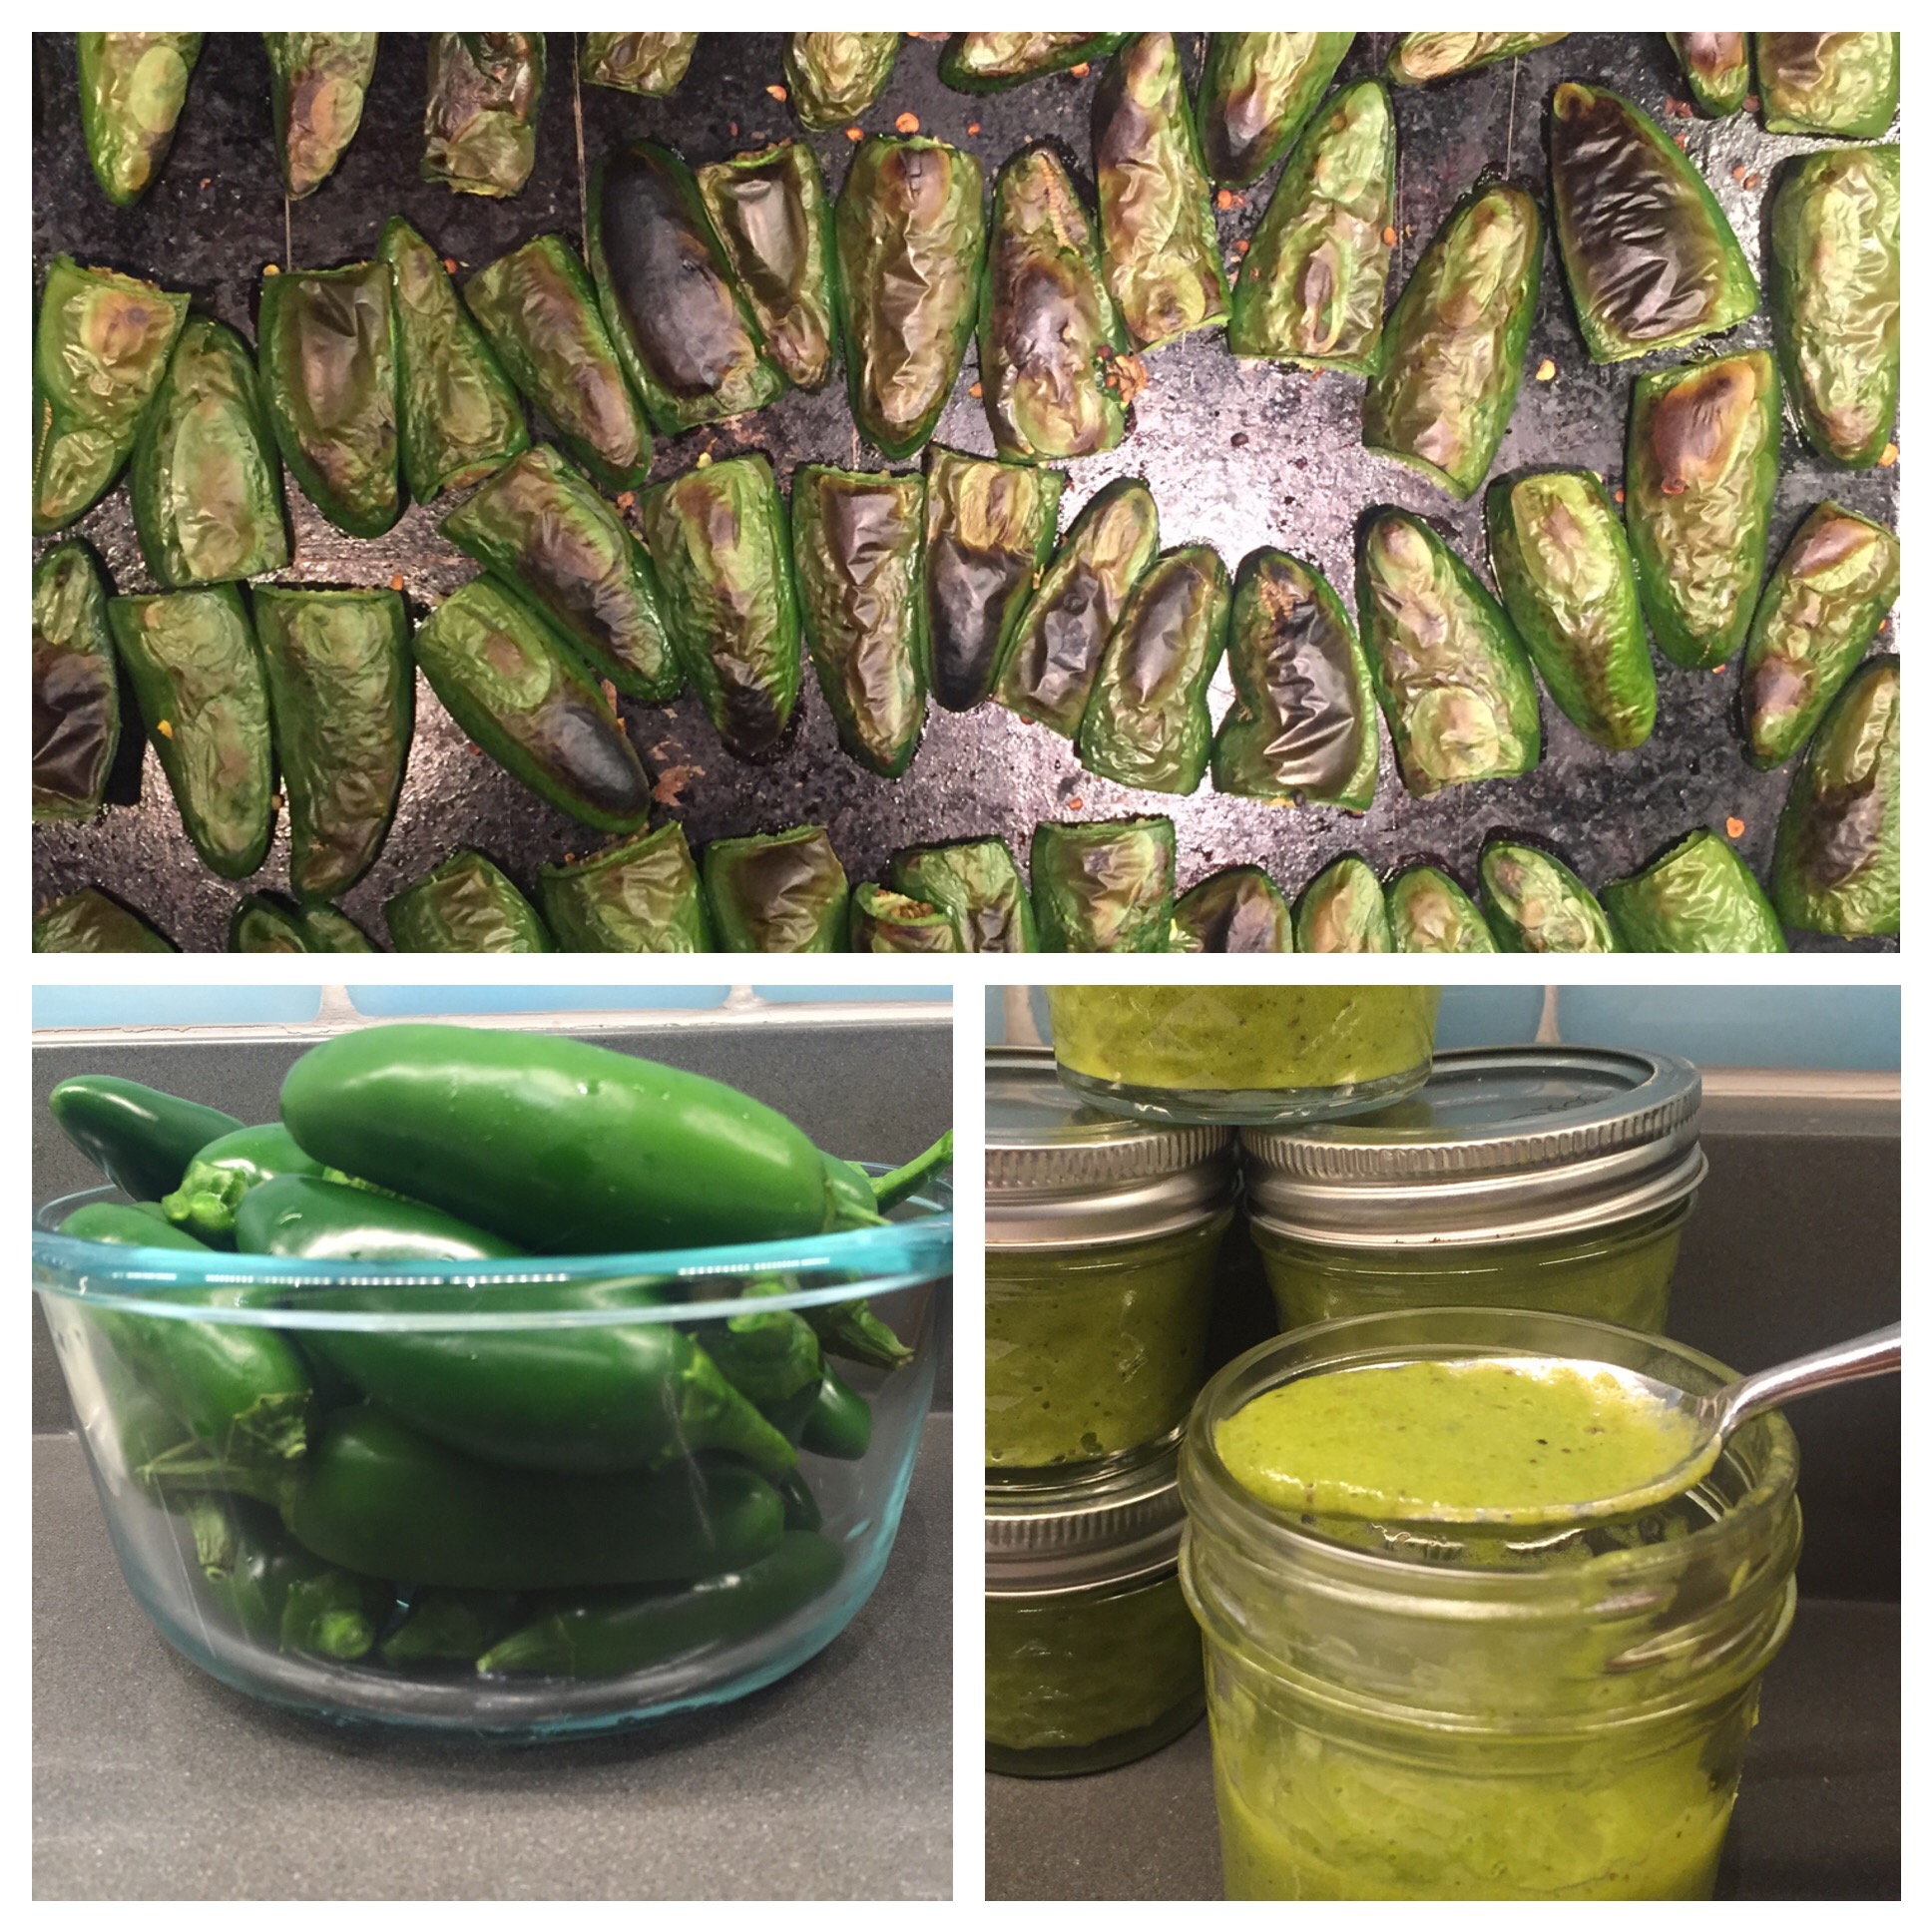
Here’s another way to preserve the jalapeños that are taking over my rooftop. If you don’t have this problem, its worth buying a whole bunch of hot peppers so you can make your own spicy sauce, which is much better than anything you can buy in the store. I only slightly modified yet another incredible recipe from Karen Solomon’s Jam It, Pickle It, Cure It.
This recipe makes about 3 cups and the sauce will last in the fridge for 6 months.
Warning: Wear gloves and work in a well-ventilated area when working with jalapeños.
Ingredients:
20-25 jalapeño peppers
2 large cloves of garlic, peeled
1.5 T kosher salt
1 cup distilled white vinegar
2 T sugar
Directions:
- Wash and dry the peppers and cut off the stems. Slice them in half lengthwise. Broil, outside skin near flame, until black and charred. Check the every few minutes as once they start charring, they turn black pretty quick.
- In a food processor or blender, puree the garlic until minced. Add the peppers, salt, vinegar, and sugar and puree for about 3 minutes. If you have a high power blender, just run all the ingredients together for 1 minute.
- Transfer to a glass jar and refrigerate.
 This comes together in a snap with just a few ingredients, and it disappears even faster. It’s a great way to use day old bread.
Enjoy!
Ingredients:
1 cup cherry tomatoes, halved
1 small garlic clove, minced
1/2 small shallot, minced
Approximately 15 basil leaves
2.5 cups Italian bread, cut into 1/2 inch cubes
2 T red wine vinegar
1/4 cup olive oil, divided
Salt and pepper
Directions:
Preheat oven to 400 degrees F.
Put the cubes of bread on a baking sheet lined with parchment paper. Drizzle bread with 1-2 T olive oil. Season with salt and pepper and stir. Put bread in the oven for 10-12 minutes until croutons are toasted. Allow to cool for a few minutes.
Combine tomatoes, garlic, shallot, vinegar, remaining oil, and salt and pepper to taste.
When the croutons are cooled, combine basil leaves and bread with tomato mixture.

Here’s a quick way to preserve jalapeño peppers. Great for topping nachos, salads, in sandwiches, etc.
Ingredients:
3/4 cup distilled white vinegar
3/4 cup water
1 garlic clove, crushed
3 T white sugar
1 T kosher salt
10 jalapeños, sliced into rings – use gloves to chop or you’ll regret it later when you take out your contact lenses.
Directions:
Pour all ingredients except peppers into a small pot. Once mixture boils, stir in jalapeños and remove from heat. Let sit for ten minutes and watch the color turn before your very eyes.
Use tongs or a slotted spoon to transfer jalapeños to a pint size mason jar and cover with vinegar mixture. Bottle it up, and enjoy topping your food with a kick for the next month or so.
